DIY Interior Design on a Budget That Actually Looks Expensive
- oliverjames0609
- 2 days ago
- 16 min read
Feeling like a beautiful home is out of reach financially is a common frustration, but it doesn't have to be your reality. Making your space look and feel amazing on a tight budget is absolutely possible. The secret isn't about spending more; it's about being smarter with your resources through careful planning, clever sourcing, and a little bit of your own handiwork.
Let's get rid of the idea that you need a massive budget to create a home you genuinely love. It's really about creativity and knowing where to put your time and money for the biggest payoff.
Your Guide to a High-End Look for Less
I get it—that feeling of being priced out of a stylish home is discouraging. This guide is designed to tackle that head-on. We're going to walk through a practical framework for achieving a genuinely polished space without breaking the bank. The key is to approach your home's transformation in phases, which keeps the process from feeling overwhelming and, more importantly, keeps it affordable.
This hands-on approach is more popular than you might realize. A huge chunk of home improvement spending is on materials and tools, not expensive contractor fees. In the United States, where spending hit around $932.7 billion, some studies estimate that DIY purchases made up a whopping ~65% of that total. This just goes to show how many people are already using budget-friendly strategies to create spaces they love. You can see more on these global home improvement spending trends on Forbes.
Prioritizing Your Projects for Maximum Impact
The real magic behind a successful budget makeover is knowing where to start. You want to prioritize the projects that give you the biggest visual bang for your buck. Think about simple changes that can completely shift the mood of a room right away.
To get the most visual return on your investment, here are a few areas that always deliver:
A Fresh Coat of Paint: Never underestimate this one. A new wall color is the single fastest and most effective way to transform a room.
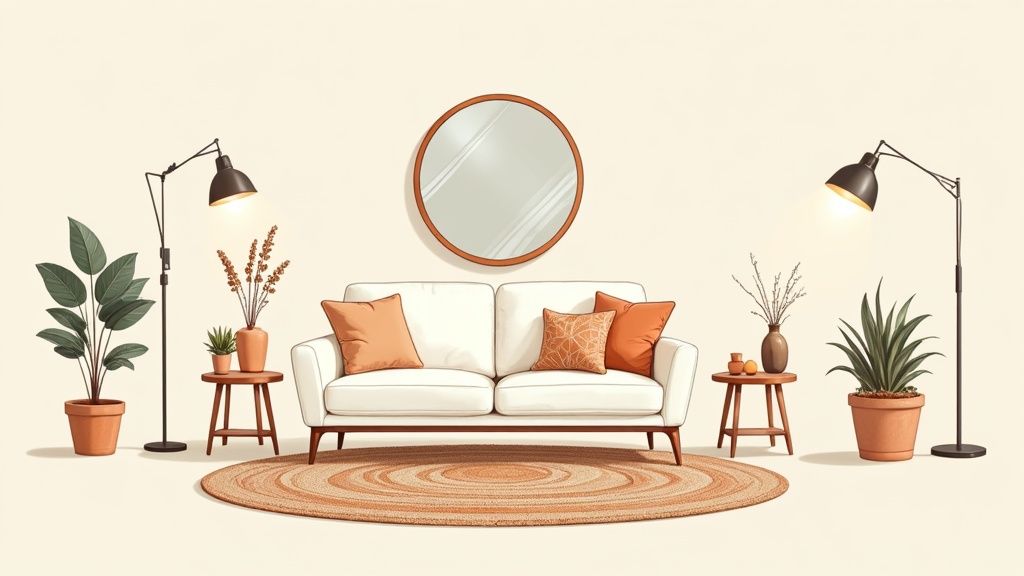
Updated Lighting Fixtures: That dated, builder-grade ceiling light? Swapping it out for something more modern can instantly elevate the entire space. Even just adding a stylish floor lamp can make a huge difference.
Textiles and Soft Furnishings: Think new curtains, a cozy rug, or a few vibrant throw pillows. These are perfect for adding color, texture, and a dose of your personality without a big commitment.
The goal is to start with changes you can see and feel immediately. This builds momentum and motivation, proving that your efforts are paying off without draining your bank account.
To help you get started, here's a quick look at some projects that give you the best bang for your buck.
High-Impact Projects for Small Budgets
This table highlights some of my favorite projects that offer an amazing visual return, helping you decide where to focus your energy and money first.
Project Idea | Estimated Cost | Skill Level | Time Commitment |
|---|---|---|---|
Paint an Accent Wall | $30 - $75 | Beginner | 3-5 hours |
Replace Cabinet Hardware | $50 - $150 | Beginner | 1-2 hours |
Install Peel-and-Stick Backsplash | $100 - $300 | Beginner | 4-6 hours |
Update a Light Fixture | $75 - $200 | Intermediate | 1-2 hours |
Thrift and Refinish Furniture | $25 - $100+ | Intermediate | 1-2 weekends |
These projects are fantastic starting points because they create noticeable change and build your confidence for whatever you want to tackle next.
The Power of Smart Planning
Before you run to the store or click "add to cart," take a breath. Having a clear plan is your best defense against costly mistakes and those impulse buys that just don't fit the vision you have in your head.
This is where modern tools can be a real game-changer. Being able to visualize your ideas is a critical step that used to be out of reach for most people. In our guide exploring virtual staging vs. traditional staging costs, we break down how technology can help you see the final result before you spend a dime.
By starting with a well-thought-out plan, you can confidently tackle your DIY interior design on a budget. This guide will walk you through every step, from building a mood board that captures your style to hunting for hidden gems at the thrift store.
Get Clear on Your Vision and Your Budget
Every great room makeover starts the same way: with a clear vision and a rock-solid plan. Trust me, jumping in without a roadmap is the fastest way to end up with a room full of things you don't love and a bank account that’s crying for help. This first phase is all about turning those daydreams into a blueprint that will guide every single choice you make.
Forget about paint swatches for a minute. The real first step is figuring out how you want the room to feel. Are you craving a cozy, curl-up-with-a-book kind of sanctuary? Or do you need a bright, energizing space where you can entertain friends? Nailing down the atmosphere and function of the room before you spend a dime is what keeps you from making impulse buys that just don't fit.
This hands-on approach is becoming the new normal. The global DIY home improvement market hit a value of about USD 0.87 trillion in 2024, and interior projects accounted for a massive 43.7% of that. It’s clear that more and more of us are rolling up our sleeves to create spaces we love on a budget. You can dig deeper into the rise of the DIY market on Mordor Intelligence.
Find Your Vibe with a Mood Board
Think of a mood board as your project's North Star. It’s simply a collage of images, textures, and colors that captures the soul of the style you're going for. This is your secret weapon for keeping the design consistent and talking yourself out of that velvet armchair that, while gorgeous, has no place in your minimalist living room.
Making one is easy and you don't need any special skills:
Use Pinterest: This is the go-to for a reason. Start a new board just for your project and start pinning anything that catches your eye—entire rooms, specific furniture pieces, color schemes, even textures and art.
Go Analog: If you're more hands-on, grab a few magazines, a corkboard, and some pins. Tearing out pages and physically arranging them is a fantastic way to see how different ideas vibe together.
After you've gathered a good collection, step back and look for patterns. Do you see a lot of clean lines and neutral tones? You're probably leaning minimalist. Is it a sea of rich textures and eclectic patterns? Hello, boho! If you’re still not sure what to call your style, try taking an online interior design style finder quiz to get some clarity.
Create a Budget You Can Actually Stick To
With your vision taking shape, it's time to talk money. A budget isn't a buzzkill; it’s a tool that empowers you. It shows you exactly where your dollars will have the most impact and saves you from a world of financial stress later.
Grab a notebook or open a simple spreadsheet and list out every single thing you might need to buy or do.
Pro Tip: Always, always add a contingency line item for 10-15% of your total budget. Something will always pop up—you'll need an extra gallon of paint, or you’ll find the perfect lamp that's just a little bit over what you planned. This buffer means a small surprise won't derail your entire project.
Let's see what this looks like for a hypothetical $800 living room refresh:
Paint & Supplies: $75
Secondhand Sofa (Facebook Marketplace): $250
Thrifted Coffee Table (for a DIY refinish): $40
New Area Rug (snagged on sale): $150
Curtains & Rod: $80
Throw Pillows & Blanket: $60
Lighting (a cool floor lamp): $50
Contingency Fund (the "just in case" money): $95
Breaking it down like this helps you prioritize. You can quickly see that you might want to splurge on a really nice rug to anchor the space, which means you’ll save by DIY-ing that thrifted coffee table. A good budget turns a big, overwhelming goal into a series of small, totally achievable steps.
How to Source Affordable Decor with Character
This is where the real fun begins—the treasure hunt. A room's soul isn't found in a sterile big-box store catalog; it's built from unique pieces that have a bit of history and personality. To create a space that feels genuinely yours, you need to look beyond the obvious and learn how to spot those hidden gems.
This part of the process turns you from just a shopper into a curator for your own home. It’s all about seeing the potential in a piece that others might overlook, knowing that with a little TLC, it can become the star of your room.
Before you start buying, it's crucial to have a solid plan. The chart below lays out a simple decision-making flow to keep your project on track and on budget from the get-go.
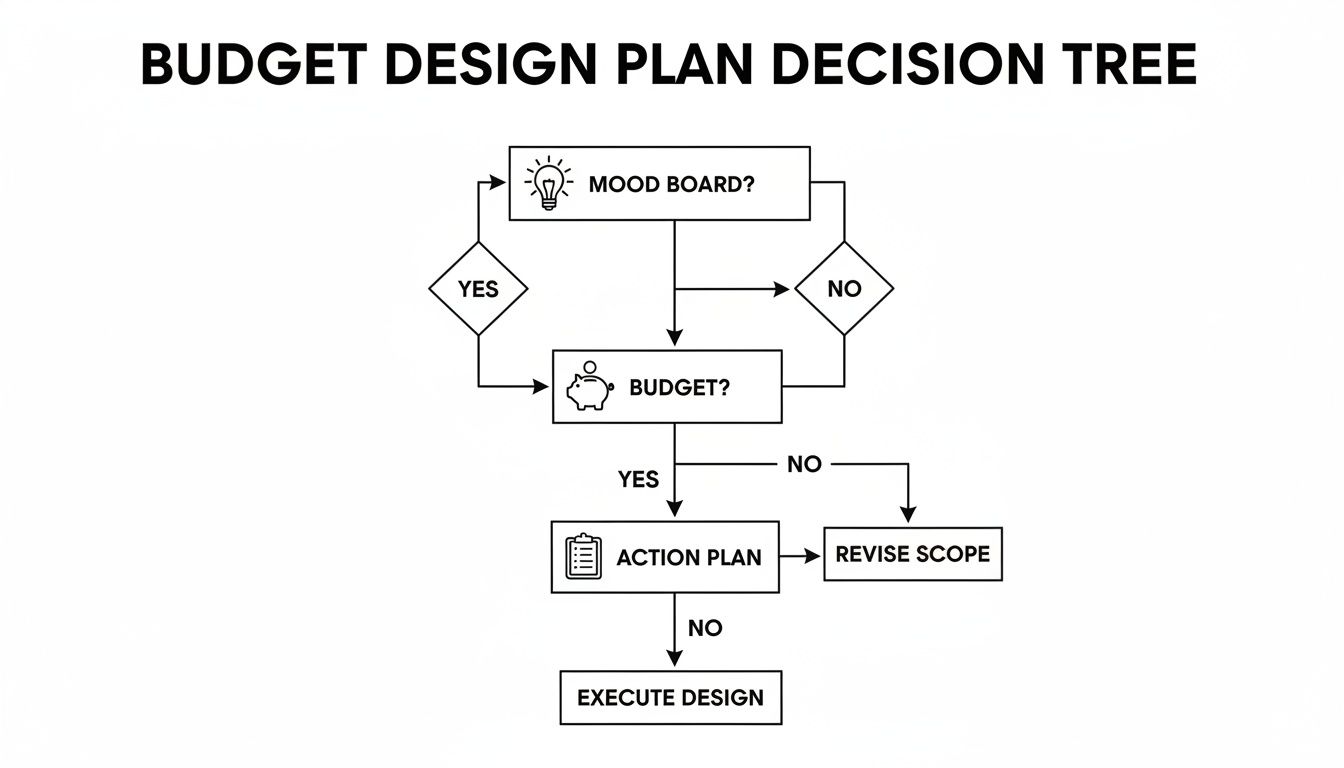
As you can see, every great design starts with a clear vision (that's your mood board!), followed by a realistic budget, and a clear action plan. Then you can start sourcing.
Navigating the Secondhand Market
Thrift stores, Facebook Marketplace, and local estate sales are going to be your new best friends. These places are goldmines for high-quality, often solid wood furniture that just needs a little love. The trick is to go in with a plan and a discerning eye.
Before you even leave the house, pull up your mood board. Know the exact measurements of the space you’re trying to fill. Trust me, this simple prep work will save you the heartache of bringing home a gorgeous dresser that’s two inches too wide for its intended wall.
When you're out there browsing, always look for pieces with "good bones." Here’s what I mean:
Solid Construction: Is it made of real wood or flimsy particleboard? Give it a gentle shake—does it feel sturdy and well-built?
Classic Shapes: Hunt for timeless silhouettes that will outlast passing trends. A simple, clean-lined side table offers far more versatility than an overly ornate, of-the-moment piece.
Minor Flaws: Don't be scared off by surface-level issues! Scratches, dated hardware, or an ugly paint color are all surprisingly easy fixes.
Here's the key takeaway: You're not just buying an object; you're buying potential. The ability to see past a dated finish to the beautiful piece underneath is the ultimate budget-decorating superpower.
The Art of the Upcycle
Upcycling is where you take something old or discarded and transform it into something even better. This is where your creativity really gets to shine, and frankly, where you can save a huge chunk of your budget.
That tired, orange-toned wood end table from the 70s might look like a lost cause at first glance. But imagine it with a good sanding and a few coats of a modern matte black paint—suddenly, it becomes a chic, high-end-looking accent piece. All it cost you was a can of paint and an afternoon.
Don't be afraid to mix and match things, either. A set of mismatched dining chairs you snagged at different garage sales can look incredibly intentional and stylish when you paint them all the same color. It creates a cohesive look that still celebrates the unique character of each piece.
For more inspiration on what to look for, you can browse home decor products on Decor8 AI and see how different styles can come together in a virtual room.
Sourcing Showdown Where to Find Your Decor
Deciding where to hunt for treasures really depends on your budget, your timeline, and how much hands-on work you're willing to put in. Each option has its own unique pros and cons.
This table breaks down the most common spots to help you decide where to focus your energy.
Sourcing Method | Pros | Cons | Best For |
|---|---|---|---|
Thrift Stores | Extremely low prices, unique finds, supports charity | Hit-or-miss inventory, requires frequent visits | Finding small decor, project furniture, and unexpected treasures. |
Facebook Marketplace | Local pickup, easy to search for specific items, can negotiate | Varies in quality, requires quick action, safety precautions | Sourcing larger furniture pieces like sofas, dressers, and dining sets. |
Estate Sales | Entire households of items, potential for high-quality vintage | Can be crowded and competitive, prices vary widely | Finding curated sets of items, vintage art, and unique collectibles. |
Budget Retail (IKEA, Target) | New condition, consistent style, predictable pricing | Mass-produced look, lower quality materials (often) | Foundational pieces like shelving, simple desks, and trendy accessories. |
In the end, the best strategy is usually a mix-and-match approach. You might invest in a new, reliable sofa from a budget retailer but then surround it with unique, character-filled tables and accessories you’ve thrifted and upcycled yourself. This is how you create a layered, personal space that looks anything but cookie-cutter.
Mastering High-Impact DIY Finishing Touches
Some of the most satisfying transformations in a home come directly from your own two hands, not your wallet. This is where you get to roll up your sleeves and add those details that really make a space sing. By taking on these projects yourself, you not only cut out expensive labor costs but also build a much deeper connection to your home.
The financial impact here is huge. Homeowners who get their hands dirty can often achieve a comparable visual result for as little as 5–20% of what a full contractor project would cost. Projects like painting, refacing cabinets, and swapping hardware usually run just a few hundred to a couple of thousand dollars, bringing that high-end look well within reach.
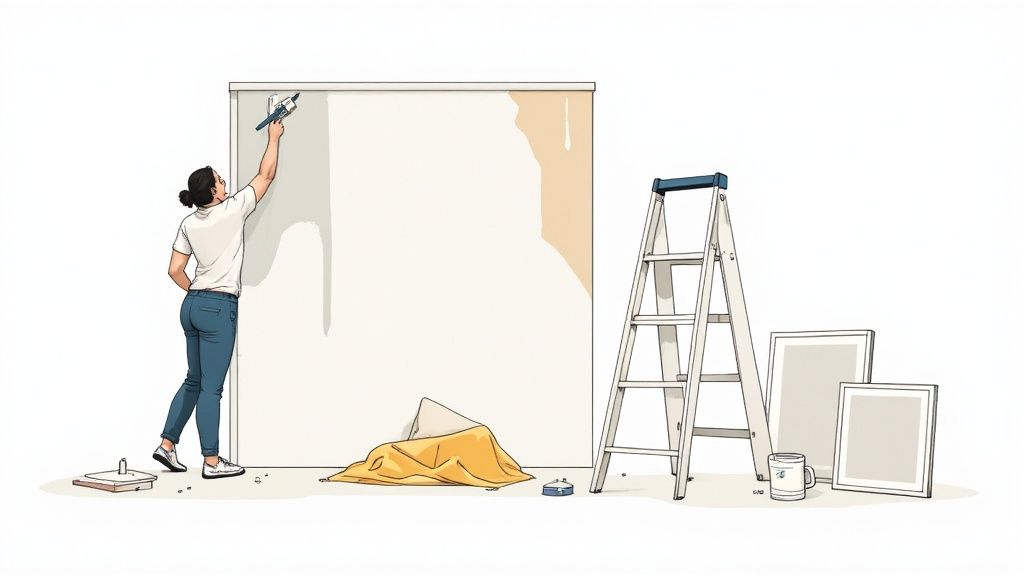
Paint a Room Like a Professional
A fresh coat of paint gives you the biggest bang for your buck, hands down. But the secret to a flawless, professional-looking finish isn't in how you roll the paint—it's all in the prep work that most people impatiently skip over.
Before you even think about popping open that can of paint, you need to tackle these steps:
Clean the Walls: Grab a bucket with some mild soap and water and give your walls a good wipe-down. This gets rid of the dust and grime that can ruin your paint's adhesion.
Tape Everything: Use high-quality painter's tape to meticulously mask off all your trim, baseboards, window frames, and the ceiling line. Don't rush this—press the edges down firmly to prevent any bleeding.
Fill and Sand: Patch up any nail holes or cracks with a bit of spackle. Once it's fully dry, lightly sand the patches until they're perfectly smooth and flush with the wall.
Only after you’ve done all that should you even think about painting. And always, always use a primer first, especially if you're making a dramatic color change. It guarantees even coverage and helps the final color look exactly like it did on the swatch.
Create a Stunning Thrifted Gallery Wall
A gallery wall adds instant personality and creates a focal point in any room, but custom framing can cost a small fortune. The budget-friendly way around this is to become a collector of secondhand frames.
Start hunting for frames in various sizes and styles at thrift stores, flea markets, and garage sales. Don't worry about the color or the art inside; just focus on interesting shapes and textures.
Once you have a nice collection, lay them all out on the floor to play with the arrangement until you land on something you love. You can unify the whole look by painting all the frames the same color—matte black or a crisp white always works—or by choosing art and photos that share a similar color palette.
A great gallery wall feels like it was collected over time. Don't be afraid to mix personal photos with abstract prints, postcards, and even interesting fabric swatches to create a display that is uniquely you.
Install a Peel-and-Stick Accent Wall
Ever wanted the bold impact of wallpaper without the commitment or the messy glue? Peel-and-stick wallpaper is your new best friend. It’s a total game-changer for renters and anyone practicing DIY interior design on a budget.
This is a project even a total beginner can handle. The key is to work slowly and methodically. Start from a top corner of the wall, peeling back just a few inches of the backing at a time. Use a smoothing tool (a credit card works in a pinch!) to press the paper onto the wall, working out any air bubbles as you go.
If you mess up, just gently peel it back and readjust. It’s a very forgiving process that delivers a massive visual punch, perfect for a headboard wall in a bedroom or a small powder room that needs some drama.
Elevate Your Lighting with Simple Upgrades
Lighting is one of the most overlooked elements in design, but it has a huge effect on a room's mood. The good news is you don't need to call an electrician to make a big difference.
Try one of these simple, high-impact lighting upgrades:
Plug-In Sconces: These give you the sophisticated look of hardwired wall lighting without touching any wires. They're perfect for framing a bed, a sofa, or a favorite piece of art.
The "Magic Light Trick": Use battery-powered, remote-controlled puck lights inside a light fixture that isn’t wired. This is a brilliant hack for adding ambient light literally anywhere.
Dimmer Switches: Swapping a standard light switch for a dimmer is a pretty simple DIY that gives you complete control over the room's atmosphere.
To really get the most out of your DIY projects, learning a few antique restoration tips can help you breathe new life into old pieces. You can turn a forgotten thrift-store lamp or a tired side table into a custom feature piece. By tackling these projects, you’re not just saving money; you’re building skills and creating a home that truly tells your story.
Visualize Your Ideas with AI Design Tools
Let’s be honest, one of the scariest parts of any DIY interior design on a budget is the fear of messing it up. What if that deep emerald green you’ve been dreaming of just looks… weird on the walls? What if that amazing vintage sofa you found is actually way too big for your tiny living room?
This is the kind of uncertainty that can stop a project in its tracks. It often pushes us toward safe, boring choices or, even worse, leads to mistakes that cost time and money to fix. This is where a little bit of tech can be a DIYer's best friend.
See Your Room in a New Light
Imagine you could try out all your craziest ideas without lifting a paintbrush or spending a dime. That's exactly what AI design tools let you do. They're designed to close the gap between what's in your head and what your room could actually look like.
Platforms like Decor8 AI give you a digital playground. You just snap a picture of your room, upload it, and start playing. It’s a fantastic way to experiment with styles, colors, and furniture layouts, all without the risk.
As you can see, the process is straightforward. You provide the photo, pick a style you're curious about, and let the AI show you a new vision for your space. This isn't just about avoiding mistakes; it's about giving yourself the confidence to make bolder, better design choices.
From Simple Photos to Realistic Renderings
The really cool part is how these tools can create images that look incredibly real, almost like they were pulled from a design magazine. This goes way beyond just changing a wall color. It's about seeing a complete, finished look.
Think about how this could work for you:
Picking Paint Colors: Instead of taping a dozen tiny swatches to your wall, you can digitally "paint" the entire room with real colors from brands like Sherwin-Williams or Behr to see the true impact.
Trying Out Furniture: Found a cool armchair on Facebook Marketplace? Before you borrow a truck to pick it up, you can see how something of a similar size and style looks in your room.
Finding Your Vibe: Maybe you're torn between a clean, minimalist look and a cozy, bohemian one. You can apply different pre-set styles to your photo and see which one feels right.
This isn't just a toy; it's a serious planning tool. When you can see a realistic preview of your design, you can move forward knowing your money and effort are going toward something you’re guaranteed to love.
To get a sense of just how realistic these images can be, it's worth checking out a dedicated photorealistic room scene generator to see where this technology is heading.
An All-in-One Toolkit for DIYers
Today’s AI tools are more than just visualizers; they're becoming your go-to project partner. Some let you digitally clear out all the clutter from a photo of a messy room, giving you a blank canvas to work with. Others can help you stage an entirely empty space from scratch.
This tech gives you the power to make smarter decisions that protect your budget. If you're ready to see how it works, our guide to the Decor8 AI Room Design Studio is the perfect place to start. It shows you how to take your ideas and turn them into stunning, professional-looking visuals.
The Final Layer: Tying It All Together
You’ve done the heavy lifting. The walls are painted, the furniture is in place, and that perfect rug you found is rolled out. Now for the fun part—the final layer of styling that pulls everything together and makes the space feel like home. This is where you transform a collection of items into a cohesive, inviting room.
It all starts with how you arrange the furniture. So many people make the mistake of just pushing everything up against the walls, but that can leave a room feeling cold and impersonal. Instead, try creating conversational groupings. Pull the sofa and chairs a bit closer, maybe anchoring them on an area rug. This simple shift creates a space that feels cozier and naturally encourages people to connect.
Bringing in Warmth and Dimension
With the big pieces set, it’s time to layer in texture. This is my secret weapon for DIY interior design on a budget because it adds a sense of richness and luxury without costing a fortune. Think about a soft throw blanket casually draped over the arm of a chair, or mixing velvet and linen pillows on the sofa. Even a woven basket next to a sleek metal side table can make a huge difference.
Playing with different materials is what gives a room that curated, high-end feel.
Here are a few combinations I love:
For the Living Room: A chunky knit blanket on a smooth leather or faux-leather sofa. The contrast is fantastic.
For the Bedroom: Crisp cotton sheets paired with a plush velvet quilt and maybe a few silk-like pillowcases.
For the Dining Area: Smooth wooden chairs softened with simple linen seat cushions.
The real goal here is to engage the senses. A room with varied textures feels more dynamic and thoughtfully put together than one where every surface feels the same. This is what adds depth and character.
Now, for all those little decor items on your coffee table or bookshelves, remember the "rule of three." For whatever reason, our eyes find groupings of odd numbers—especially threes—more balanced and appealing. Try putting a small stack of books, a little plant, and a favorite candle together.
Make sure to vary the height and scale of the items within your little group to create a more interesting skyline. This simple trick helps you display your favorite things in a way that looks intentional and stylish, not just cluttered. It’s that final polish that makes your budget-friendly space look finished and feel completely yours.
Answering Your Top Budget Decorating Questions
When you're diving into a DIY design project on a budget, it’s natural for a few questions to pop up. Let’s tackle some of the most common ones with practical advice to keep you moving forward with confidence.
What’s the very first thing I should do for a budget makeover?
Hold off on the shopping trip! Your true first step is all about planning.
Before you spend a single dime, you need a mood board to nail down your style and a detailed budget to control your spending. This prep work is your secret weapon against impulse buys. It ensures every dollar is spent wisely and helps you create that cohesive look you're after.
Making Every Inch and Dollar Count
How can I make a small room feel bigger without major construction?
This is a classic design dilemma, but thankfully, it has some simple fixes.
Large mirrors are your best friend here; they bounce light around and create a convincing illusion of depth. A carefully placed mirror can literally make a room feel twice its size. Also, stick to light, neutral paint colors—they open up a space and make it feel airy. Finally, opt for furniture with visible legs to create open space underneath, which tricks the eye into seeing a larger room.
Where should I splurge and where should I save?
This is probably the most important question for stretching your budget. The rule of thumb is pretty simple:
Invest in the pieces you use every single day. Think about your sofa, your mattress, and your dining chairs. These items need to be comfortable and built to last. Save on everything else. Accessories like throw pillows, curtains, wall art, and accent tables are fantastic candidates for thrifting or a fun DIY project.
Thinking strategically about where your money goes is the key to getting a high-end look that stands the test of time.
For even more answers to your design questions, you can find a wealth of information in our comprehensive list of frequently asked questions.
Ready to stop guessing and start seeing your ideas come to life? With Decor8 AI, you can visualize your designs in your actual room before making any commitments. Just upload a photo and start experimenting with different paint colors, furniture, and styles until you find the perfect look.