10 Smart Room Layout Ideas to Maximize Your Space in 2026
- oliverjames0609
- Jan 12
- 18 min read
The right room layout is the invisible architecture of your home. It’s the foundational decision that dictates how a space feels and functions, transforming a room from a simple collection of furniture into an environment that supports your lifestyle. Get it right, and even a small area can feel open and intuitive. Get it wrong, and the most beautifully decorated room can feel awkward, cramped, and impractical. This is where moving beyond guesswork becomes essential.
This guide is designed to be your practical blueprint, providing a comprehensive roundup of professional room layout ideas that solve common design challenges. We are not just talking about abstract concepts; we are providing actionable strategies for everything from sprawling open-plan areas to compact home offices. You will find specific measurements, clear furniture placement advice, and crucial traffic flow considerations for each layout. Forget the exhausting trial-and-error of physically moving heavy furniture back and forth.
Here, you will learn how to implement proven layouts for kitchens, bedrooms, and multifunctional spaces. More importantly, we will show you how to visualize these ideas instantly. Using Decor8 AI, you can generate realistic 3D renderings of each concept in your own space, allowing you to experiment with different arrangements, styles, and furniture before committing to a single change. This is your opportunity to design with confidence, ensuring the final result is both beautiful and perfectly suited to your daily life. Let’s start creating spaces that truly work.
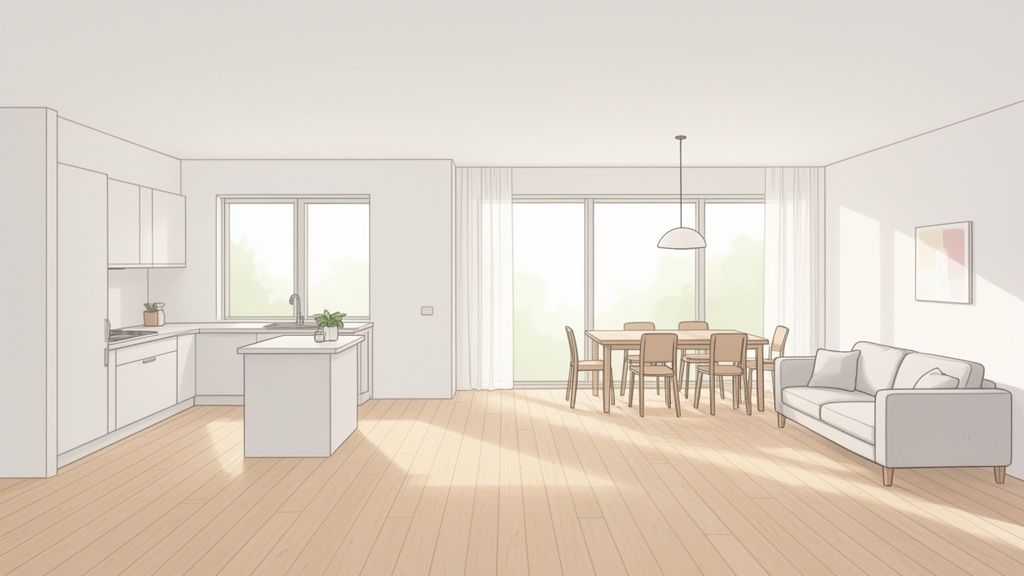
1. Open Floor Plan Layout
An open floor plan layout removes walls between primary living areas to create a single, expansive space. This popular approach typically combines the kitchen, dining room, and living room into one large, multifunctional area. The result is a home that feels bright, airy, and significantly more spacious, making it a cornerstone of modern residential design and one of the most sought-after room layout ideas for new homebuyers.
Why It Works
This layout excels at enhancing natural light and creating seamless traffic flow, which is ideal for both daily family life and entertaining guests. It allows for easy interaction between people in different "zones," like someone cooking in the kitchen and another watching TV in the living area. For real estate marketing, an open concept makes a property appear larger and more valuable, simplifying virtual staging efforts. For more inspiration on creating expansive and interconnected living spaces, discover these 10 Open Floor Plan Design Ideas.
Key Implementation Tips
Creating a cohesive open layout requires careful planning to avoid a chaotic or cluttered feel. Here’s how to get it right:
Define Zones with Furniture: Use area rugs to anchor each functional space (living, dining). Arrange sofas to create a conversational "room" that feels separate from the dining table.
Use Visual Separators: A kitchen island with pendant lighting is a classic way to delineate the kitchen from the living area without a wall. A well-placed console table behind a sofa can also create a subtle boundary.
Maintain Visual Consistency: Unify the entire space with a single type of flooring. Use a consistent color palette across all zones, adding pops of complementary accent colors in each area to create distinction.
Plan Your Traffic Flow: Ensure there are clear, unobstructed pathways at least 36 inches wide between zones to allow for comfortable movement.
Visualize with Decor8 AI: Before committing, use a prompt like "Render a photorealistic, modern open-plan living space with a large L-shaped sectional, a central kitchen island, and a minimalist dining area, using a consistent Scandinavian color palette of white, light wood, and grey." This helps you test furniture arrangements and zone definitions virtually.
2. L-Shaped Layout
An L-shaped room layout positions furniture or functional zones along two perpendicular walls, creating a natural and efficient corner arrangement. This approach is highly effective for maximizing the utility of corner space, making it one of the most practical room layout ideas for compact living. It is commonly used to create multifunctional zones in bedrooms, kitchens, and living rooms, offering clear separation while maintaining an open feel.
Why It Works
The L-shaped layout excels at defining distinct activity areas without physical barriers, making it ideal for studio apartments or small homes that require versatility. For instance, one leg of the "L" can serve as a living area while the other becomes a dining nook or home office. This natural division creates an intuitive traffic flow around a central open space, preventing the room from feeling cramped or cluttered. For more ideas on maximizing compact spaces, explore these clever layout solutions for small apartments.
Key Implementation Tips
A successful L-shaped layout depends on balancing the two zones so they feel both distinct and connected. Here’s how to implement this layout effectively:
Anchor with Key Furniture: Place the largest furniture piece, like a sectional sofa or a bed, along one wall to establish the primary zone. Use the perpendicular wall for the secondary function, such as a desk or a dining set.
Define Zones with Color and Rugs: Use area rugs to clearly demarcate each functional space. Color blocking, or painting the corner walls in different but complementary shades, can also create a powerful visual separation.
Ensure Proper Lighting: Corners can become dark. Install layered lighting, such as a floor lamp in the living area and a pendant light over the dining or work area, to ensure both zones are well-lit and inviting.
Choose Multifunctional Pieces: Select furniture that can serve multiple purposes, like an ottoman with storage or a dining table that can double as a workspace, to maximize efficiency.
Visualize with Decor8 AI: Before you start moving furniture, test your ideas. Use a prompt like "Render a photorealistic, small L-shaped room with a bed and wardrobe along one wall and a compact home office setup on the adjacent wall, using a light and airy Scandinavian color scheme." This will help you visualize the spatial balance and flow.
3. Galley Kitchen Layout
A galley kitchen layout arranges cabinets, countertops, and appliances along two parallel walls, forming a narrow corridor. This classic design is renowned for its efficiency, creating a highly functional "work triangle" where the sink, stove, and refrigerator are in close, convenient proximity. Often found in apartments, vintage homes, and narrow townhouses, this layout maximizes utility in limited square footage, making it one of the most practical room layout ideas for compact living.
Why It Works
The galley layout excels at streamlining the cooking process by minimizing the steps needed to move between key work zones. Its linear nature keeps everything within easy reach, which is ideal for a single cook. For property marketing, a well-designed galley kitchen can be presented as a "chef's kitchen" that emphasizes function and efficiency over sheer size. This layout is a testament to the idea that a great kitchen is defined by its workflow, not just its footprint.
Key Implementation Tips
The primary challenge of a galley kitchen is making it feel open and preventing a cramped, tunnel-like effect. Smart design choices are essential for success:
Use Light and Reflective Materials: Opt for light-colored cabinets, countertops, and backsplashes to make the space feel wider and brighter. Mirrored or glossy backsplashes can also enhance the sense of space.
Incorporate Open Shelving: Replace some upper cabinets with open shelves to reduce visual bulk. This creates an airy feel and provides an opportunity for decorative styling.
Choose Compact Appliances: Select slim-profile refrigerators and smaller-scale appliances that won't protrude too far into the walkway, ensuring clear traffic flow.
Prioritize Smart Lighting: Install under-cabinet lighting to illuminate work surfaces and a stylish ceiling fixture to draw the eye upward, making the ceiling feel higher. For more tips on kitchen design, explore how to create a functional and fabulous kitchen.
Visualize with Decor8 AI: Test different finishes before you commit. Use a prompt like "Render a photorealistic galley kitchen with light grey shaker cabinets on one wall and open wood shelving on the opposite wall, featuring a white quartz countertop and a patterned tile floor." This helps you balance materials and colors to achieve an open, inviting look.
4. Peninsula or Island Kitchen Layout
A peninsula or island layout introduces a freestanding (island) or attached (peninsula) counter unit into the kitchen, acting as a multifunctional hub. This design bridges the gap between fully open and traditional closed kitchens by offering additional work surfaces, storage, and casual seating. As one of the most popular room layout ideas, islands and peninsulas serve as natural gathering spots and powerful design focal points in modern homes.

Why It Works
This layout dramatically improves kitchen functionality and workflow, creating an efficient work triangle between the sink, stove, and refrigerator. It provides a designated space for meal prep, casual dining, and socializing, keeping guests out of the primary cooking zone while still allowing for interaction. For real estate purposes, a well-designed island or peninsula significantly boosts a property's perceived value and lifestyle appeal.
Key Implementation Tips
Proper spacing and design are critical for a successful island or peninsula layout. Follow these guidelines to optimize the space:
Ensure Proper Clearance: Maintain a minimum of 42 inches of clear walkway space around all sides of the island to allow for comfortable movement and appliance access.
Design for Seating: For comfortable bar-style seating, ensure the counter overhang is at least 15 inches deep for a standard 36-inch-high counter.
Create a Focal Point: Use contrasting materials or colors for the island to make it stand out. A dark-colored island with light perimeter cabinets is a classic, high-impact combination.
Add Functional Lighting: Install pendant lights above the island or peninsula to provide task lighting and enhance the area's visual appeal. Stage with simple barstools and a small vase to showcase its lifestyle potential.
Visualize with Decor8 AI: Before installation, test your design choices using a prompt like "Render a photorealistic contemporary kitchen with white perimeter cabinets, a navy blue central island with a waterfall quartz countertop, and three brass pendant lights overhead." This helps you perfect the color and material combination.
5. U-Shaped Kitchen Layout
A U-shaped kitchen layout, also known as a horseshoe layout, arranges cabinetry, countertops, and appliances along three adjacent walls. This design forms an efficient and contained workspace, creating the classic "work triangle" between the stove, sink, and refrigerator. It’s one of the most functional room layout ideas for serious home cooks, as it offers expansive counter space and ample storage, keeping everything within easy reach.
Why It Works
This layout is a powerhouse of efficiency, minimizing movement between key tasks like prepping, cooking, and cleaning. The three-walled configuration keeps foot traffic out of the primary work area, which is ideal for busy households and those who love to entertain. For real estate marketing, a well-executed U-shaped kitchen signifies a high-end, functional space, often found in larger homes and appealing to buyers who value a "chef's kitchen."
Key Implementation Tips
To make the most of a U-shaped layout, careful planning is essential to prevent the space from feeling cramped or inefficient. Here’s how to get it right:
Mind the Gap: Ensure the open floor space between the parallel sides is at least 5 to 6 feet wide. This allows for comfortable movement and enables two people to work without bumping into each other.
Optimize Corner Storage: Corners can be awkward, so use innovative storage solutions like lazy Susans, pull-out shelving, or corner drawers to maximize every inch of cabinet space.
Add an Island: If the U-shape is wide enough (over 10 feet), adding a central island can provide extra prep space, a casual dining spot, or an additional sink.
Layer Your Lighting: A single ceiling fixture won't suffice. Install under-cabinet lighting for task areas, pendant lights over an island or peninsula, and recessed lights for overall ambient illumination.
Visualize with Decor8 AI: Before finalizing your design, use a prompt like "Render a photorealistic, transitional U-shaped kitchen with shaker-style cabinets, a marble countertop, and a central island. Use Benjamin Moore's 'White Dove' for upper cabinets and 'Hale Navy' for lower cabinets to test a two-tone look." This helps you visualize material combinations and spatial flow.
6. Master Bedroom with Sitting Area Layout
A master bedroom with a sitting area layout transforms the primary bedroom from a simple sleeping space into a luxurious, multi-functional private retreat. This design carves out a dedicated zone for relaxation, reading, or conversation, completely separate from the bed. Often found in high-end homes and luxury hotel suites, this is one of the most aspirational room layout ideas for those with ample square footage, creating a sanctuary-like atmosphere.
Why It Works
This layout adds a layer of sophistication and practicality, significantly increasing the room's perceived value and comfort. It provides a personal escape within the home, ideal for unwinding without having to be in bed. For real estate marketing, showcasing a master suite with a distinct sitting area is a powerful selling point that signals luxury and appeals to buyers seeking a premium lifestyle. For more guidance on creating this type of space, you can elevate your bedroom design into a true haven.
Key Implementation Tips
Successfully creating two zones in one room requires thoughtful design to ensure the space feels cohesive yet distinct. Follow these tips for a balanced layout:
Anchor Each Zone: Use a large area rug under the bed and a separate, smaller rug for the sitting area. This visually defines the two spaces without physical barriers.
Optimize Natural Light: Position the seating area-such as two armchairs and a small table-near a window to create a bright and inviting reading nook.
Maintain Cohesion: Use a consistent color palette and material finishes across both the sleeping and sitting zones. Unify the design with complementary accent pillows, throws, and artwork.
Create Ambiance with Lighting: Supplement overhead lighting with softer options in the seating area, such as a stylish floor lamp or wall sconces, to create a cozy atmosphere.
Visualize with Decor8 AI: Before moving furniture, use a prompt like "Render a photorealistic, large master bedroom with a king-sized upholstered bed and a separate sitting area by the window featuring two velvet armchairs and a marble side table. Use a tranquil color palette of sage green, cream, and brass accents." This allows you to perfect the zone separation and luxury feel.
7. Home Office with Meeting Space Layout
A home office with a dedicated meeting space is a dual-zone layout designed for the modern professional. This approach divides a single room into two distinct areas: one for focused, individual work and another equipped for client calls, team collaborations, or small in-person meetings. This separation supports productivity by minimizing distractions while creating a professional, client-ready environment within the home, making it one of the most practical room layout ideas for the remote workforce.
Why It Works
This layout addresses the challenge of balancing private work with professional interaction. It allows for a clean, curated background for video calls that is separate from the primary desk area, which may be cluttered with daily tasks. For real estate purposes, showcasing a room with this defined functionality adds significant value, appealing directly to the growing market of high-level professionals and entrepreneurs working from home. For more guidance on creating a productive workspace, explore our tips for designing a home office.
Key Implementation Tips
A successful dual-zone office feels intentional and uncluttered. The goal is to create two functional spaces that coexist harmoniously without feeling cramped.
Define Zones Visually: Use an area rug under the meeting area chairs and table to create a visual boundary. A stylish, open-backed bookshelf can also serve as a non-intrusive room divider.
Prioritize a Professional Backdrop: Position the meeting zone so that the background for video calls is clean and professional. Built-in shelving, a simple piece of art, or a wall painted in a soft, neutral color from Benjamin Moore works well.
Optimize Desk Placement: Place your primary work desk near a window to maximize natural light for daily tasks and improve on-camera lighting for informal calls.
Select Ergonomic Seating: Invest in a high-quality ergonomic chair for your main desk and comfortable, yet professional, armchairs for the meeting space to ensure comfort for both you and your guests.
Visualize with Decor8 AI: Test different configurations with a prompt like "Render a photorealistic home office with a modern oak desk facing a large window. In the opposite corner, create a small meeting area with two grey upholstered armchairs, a small round coffee table, and a large fiddle leaf fig plant. The walls are painted Sherwin-Williams' 'Sea Salt'." This allows you to perfect the zone separation and aesthetic before buying furniture.
8. Mudroom and Entryway Organization Layout
A mudroom and entryway organization layout is a highly functional design focused on creating a dedicated transitional space. It uses built-in or freestanding storage solutions like benches, hooks, and cubbies to organize coats, shoes, bags, and other daily essentials right at the entrance of a home. This practical approach prevents clutter from spreading into the main living areas, making it an invaluable feature for busy families and a significant selling point in modern real estate.
Why It Works
This layout excels at creating order and efficiency, providing a designated "drop zone" that keeps the rest of the home tidy. It makes a powerful first impression on guests and potential buyers by showcasing a home's organizational capacity and thoughtful design. For real estate staging, a well-organized entryway suggests a well-maintained property. If you're looking for more inspiration, check out these tips for designing a mudroom that's both functional and stylish.
Key Implementation Tips
A successful mudroom layout feels spacious and uncluttered, not cramped. Here’s how to achieve a clean and effective design:
Create Designated Zones: Assign specific spots for different items. Use low cubbies for shoes, hooks for coats and backpacks, and upper shelves for less-frequently used items like hats and gloves.
Integrate Seating: A built-in or freestanding bench provides a convenient place to sit while putting on or taking off shoes. Look for benches that offer storage underneath to maximize utility.
Maximize Light and Space: Use light paint colors to make the space feel larger and more welcoming. Install bright, layered lighting and add a large mirror to reflect light and create an illusion of depth.
Keep Staging Minimal: For showings or photos, limit visible items to a few high-quality accessories. Store most items in decorative baskets or behind closed doors to maintain a clean look.
Visualize with Decor8 AI: Before building, test your layout ideas. Use a prompt like "Render a photorealistic, transitional-style mudroom with white vertical shiplap walls, a built-in dark grey bench with three cubbies underneath, and black metal coat hooks above." This allows you to experiment with colors, materials, and configurations.
9. Boutique Hotel-Style Master Bathroom Layout
A boutique hotel-style layout transforms a master bathroom from a purely functional space into a luxurious private retreat. This approach emphasizes spa-like features and a thoughtful arrangement of elements, often centered around a stunning freestanding soaking tub. Key components include a separate glass shower enclosure, a double vanity for personal space, and even a small seating or lounging area. This is one of the most aspirational room layout ideas, designed to create a personal sanctuary that significantly boosts a home's perceived luxury and market value.
Why It Works
This layout excels at creating a sense of escape and indulgence within the home. The separation of wet zones (tub and shower) from dry zones (vanity and seating) enhances both safety and comfort. For real estate purposes, a hotel-inspired master bath is a powerful selling feature, conveying a high-end lifestyle that appeals to discerning buyers. For more inspiration on creating a highly functional and aesthetically pleasing master bathroom, explore these best bathroom layout ideas.
Key Implementation Tips
Achieving this high-end look requires a focus on material quality, strategic placement, and layered lighting. Here’s how to implement it effectively:
Create a Focal Point: Position a freestanding tub near a window to take advantage of natural light and views, instantly establishing a serene focal point.
Zone the Space: Use flooring changes, half-walls, or glass partitions to visually separate the shower and tub area from the vanity. This creates distinct "rooms" within the bathroom.
Incorporate Layered Lighting: Combine ambient lighting (recessed lights), task lighting (sconces at the vanity), and accent lighting (a small chandelier over the tub) to create a warm, inviting atmosphere.
Prioritize Luxury Finishes: Use a calming, neutral color palette and high-quality materials like marble, natural stone, and wood. For additional design concepts, discover these 10 inspiring bathroom renovation ideas for your 2026 project.
Visualize with Decor8 AI: Test different high-end finishes before purchasing. Use a prompt like "Render a photorealistic, boutique hotel master bathroom with a white freestanding tub under a large window, a double vanity with marble countertops painted in Sherwin-Williams' 'Naval', and a walk-in shower with frameless glass." This allows you to experiment with colors and materials to perfect your spa-like design.
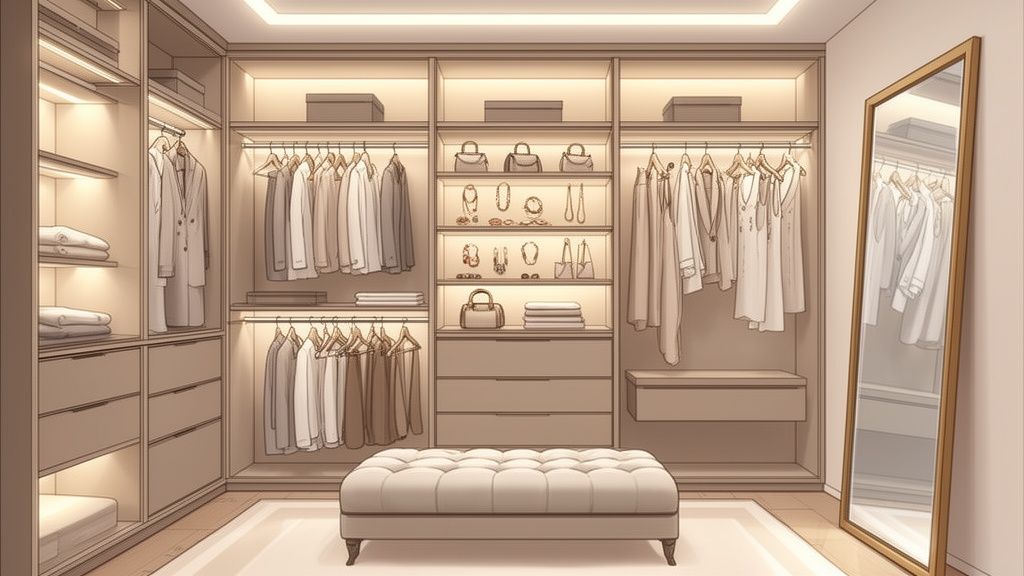
10. Walk-In Closet with Dressing Area Layout
A walk-in closet with a dressing area layout transforms a standard storage space into a luxurious, multifunctional personal sanctuary. This design combines highly organized zones for clothing, shoes, and accessories with a dedicated space for dressing, complete with seating, mirrors, and proper lighting. It functions as both a high-capacity storage solution and an elegant styling retreat, making it one of the most aspirational room layout ideas.
Why It Works
This layout excels at adding a sense of luxury and order to a home, significantly increasing its perceived value. By separating the dressing function from the bedroom, it creates a more serene and organized sleeping environment. For real estate marketing, this feature is a powerful selling point, appealing to fashion-conscious buyers and those seeking a high-end lifestyle. It's prominently featured in luxury homes, designer residences, and high-end boutique hotel suites.
Key Implementation Tips
Executing a functional and beautiful dressing room layout requires more than just shelving. It involves creating an experience.
Zone Your Storage: Designate specific areas for different items. Use double hanging rods for shirts and pants to maximize vertical space, open shelving for sweaters, and glass-front drawers for accessories.
Create a Focal Point: The dressing area should feel distinct. Anchor it with a stylish ottoman or a small vanity, a full-length mirror, and dedicated task lighting.
Prioritize Lighting: Install consistent, high-quality lighting throughout the closet to ensure accurate color representation when selecting outfits. Use accent lighting to highlight shoe walls or handbag displays.
Elevate the Details: Use matching, high-quality hangers for a uniform look. Stage with attractive storage boxes, and display a few select designer pieces to create an aspirational, boutique-like atmosphere.
Visualize with Decor8 AI: Test different configurations with a prompt like "Render a photorealistic, boutique-style walk-in closet with dark wood cabinetry, a central upholstered ottoman, glass-front drawers for accessories, and warm LED accent lighting on a shoe display wall." This helps you perfect the balance between storage and style.
10 Room Layouts: Side-by-Side Comparison
Layout | Implementation Complexity 🔄 | Resource Requirements ⚡ | Expected Outcomes 📊 ⭐ | Ideal Use Cases 💡 | Key Advantages ⭐ |
|---|---|---|---|---|---|
Open Floor Plan Layout | 🔄🔄 | ⚡⚡ | ⭐⭐⭐ — larger perceived space, better light | Modern homes, entertaining, real estate listings | Enhanced light & flow; versatile staging |
L-Shaped Layout | 🔄 | ⚡ | ⭐⭐ — efficient use of small areas, clear zones | Studios, small homes, kitchen nooks | Maximizes corner space; distinct functional zones |
Galley Kitchen Layout | 🔄🔄 | ⚡ | ⭐⭐ — highly efficient workflow, space-saving | Narrow apartments, vintage homes, prep kitchens | Excellent work triangle; minimal circulation waste |
Peninsula / Island Kitchen Layout | 🔄🔄🔄 | ⚡⚡⚡ | ⭐⭐⭐⭐ — increases usability and buyer appeal | Open-concept homes, entertaining spaces | Extra prep/storage; social focal point |
U-Shaped Kitchen Layout | 🔄🔄🔄 | ⚡⚡⚡ | ⭐⭐⭐ — maximum counter/storage; professional feel | Large homes, serious cooks, family kitchens | Superior storage & multiple workstations |
Master Bedroom with Sitting Area | 🔄🔄 | ⚡⚡⚡ | ⭐⭐⭐⭐ — luxury retreat, higher perceived value | Master suites, luxury listings, upscale remodels | Creates luxury lifestyle appeal; multi-use space |
Home Office with Meeting Space | 🔄🔄 | ⚡⚡ | ⭐⭐⭐ — improves productivity and marketability | Remote workers, entrepreneurs, client-facing roles | Separates focus vs. meeting zones; professional staging |
Mudroom & Entryway Organization | 🔄🔄 | ⚡ | ⭐⭐⭐ — reduces clutter; strong first impression | Family homes, suburban properties, new builds | Keeps home organized; practical buyer appeal |
Boutique Hotel-Style Master Bathroom | 🔄🔄🔄 | ⚡⚡⚡ | ⭐⭐⭐⭐ — spa-like luxury; strong value driver | Luxury homes, high-end listings, model homes | Spa experience; differentiates property in market |
Walk-In Closet with Dressing Area | 🔄🔄🔄 | ⚡⚡⚡ | ⭐⭐⭐⭐ — high luxury and lifestyle appeal | Celebrity/lead properties, luxury developments | Exceptional organization; aspirational staging |
From Idea to Reality: Your Next Step in Room Design
We've explored a comprehensive collection of room layout ideas, from the sweeping expanses of an open-plan concept to the efficient, organized flow of a galley kitchen. Each layout we covered, whether it was the luxurious master bedroom with a sitting area or the highly functional mudroom and entryway, serves as a powerful blueprint. The core takeaway is that a successful room layout is never an accident; it is the deliberate, thoughtful foundation upon which all other design choices are built.
The right arrangement of furniture and defined zones can transform a chaotic space into a harmonious one. It can make a small room feel spacious and a large, intimidating area feel cozy and inviting. This is the true power of understanding spatial relationships.
Key Principles to Carry Forward
As you move from inspiration to implementation, remember the fundamental principles that thread through all great room layout ideas:
Function First, Form Second: Always begin by considering how you will use the space. The most beautiful room is a failure if it doesn't support your daily activities, whether that's cooking, relaxing, working, or entertaining. Define your primary and secondary functions before a single piece of furniture is moved.
Master the Traffic Flow: The invisible pathways that guide movement through a room are its lifelines. A successful layout ensures these paths are clear, intuitive, and at least 30-36 inches wide. Avoid creating dead ends or forcing awkward navigation around furniture.
Create Intentional Zones: Even in the smallest studio or the largest open-plan area, zoning is critical. Use furniture groupings, area rugs, and strategic lighting to delineate specific areas for different activities, such as conversation, dining, or reading. This brings order and purpose to the overall layout.
Scale and Proportion are Everything: The relationship between your furniture pieces and the room's dimensions is crucial. A massive sectional can overwhelm a small living room, just as diminutive furniture can get lost in a cavernous space. Strive for balance to create a visually pleasing and comfortable environment.
Your Actionable Path to the Perfect Layout
Thinking about these concepts is the first step, but bringing them to life is where the real transformation happens. It’s time to move beyond abstract planning and into concrete visualization. Many homeowners get stuck at this stage, struggling to imagine how a floor plan on paper will actually feel in three dimensions. This uncertainty can lead to costly mistakes or design paralysis.
Fortunately, you no longer have to guess. The difference between a good layout and a great one often comes down to iteration and experimentation, a process that used to be reserved for professionals with complex software. Now, you can test every idea, from the U-shaped kitchen to the boutique hotel-style bathroom, without any risk. Visualizing your room layout ideas is the most effective way to validate your choices, catch potential problems, and refine your design until it is perfect for your home and lifestyle.
The principles and examples in this guide provide the "what" and the "why." The next step is to see the "how" in your own space. By applying these foundational ideas and using modern tools to visualize the outcome, you are fully equipped to create a room that is not just aesthetically pleasing but also perfectly attuned to your needs. Your ideal home is not a distant dream; it is a series of well-planned decisions waiting to be made.
Ready to stop guessing and start visualizing? Bring your favorite room layout ideas to life with Decor8 AI. Upload a photo of your room, select a layout, and instantly see a photorealistic render of your new space, allowing you to experiment with confidence before making any commitments. Try Decor8 AI for free and turn your vision into reality today.