How to Paint a Door for a Perfect Professional Finish
- oliverjames0609
- 6 days ago
- 16 min read
Painting a door isn't complicated, but the secret to a professional-looking job lies in a simple, time-tested process: clean and sand the surface, apply a quality primer, and then add two thin coats of durable paint. I always tell people that the real work—the part that guarantees a great result—happens long before you even open the paint can.
Your Essential Guide to a Flawless Door Makeover
A fresh coat of paint on a door can completely transform the vibe of a space. But getting that smooth, brush-stroke-free finish takes a bit more know-how than just grabbing a brush. This guide will walk you through the process, helping you sidestep those common DIY mistakes to get a finish that looks like it was done by a pro.
First things first, we need to talk about the difference between an interior door and an exterior one. A front door is constantly battling the elements—UV rays, rain, and temperature shifts—so it needs a paint built for that fight. An interior door, on the other hand, needs to stand up to daily life, like scuffs, fingerprints, and constant handling.
Understanding Paint Finishes and Durability
The sheen you choose is just as critical as the color. It impacts not only how the door looks but also how it holds up over time and how easy it is to wipe down.
Here’s a quick rundown of your options:
High-Gloss: This is your most durable choice, offering a shiny, almost reflective surface. It's fantastic for high-traffic doors but be warned—it will show every single surface imperfection.
Semi-Gloss: My personal go-to for doors and trim. It's a practical, popular finish that resists scuffs well and is easy to clean without being blindingly shiny.
Satin: If you want something a bit more subtle, satin is perfect. It gives you a velvety, low-luster look that’s more forgiving of minor flaws and adds a touch of modern sophistication.
Flat/Matte: This finish is best saved for walls in low-traffic areas. While it’s great at hiding imperfections, it’s the least durable and a real pain to clean.
It's a great time to be a DIYer. The global paints and coatings market is expected to hit USD 223.49 billion by 2030, and a huge part of that growth comes from architectural paints for home projects like this. This means we have access to better, more advanced, and eco-friendly low-VOC paint options than ever before. You can see how these market trends are shaping the products on the shelf if you're curious.
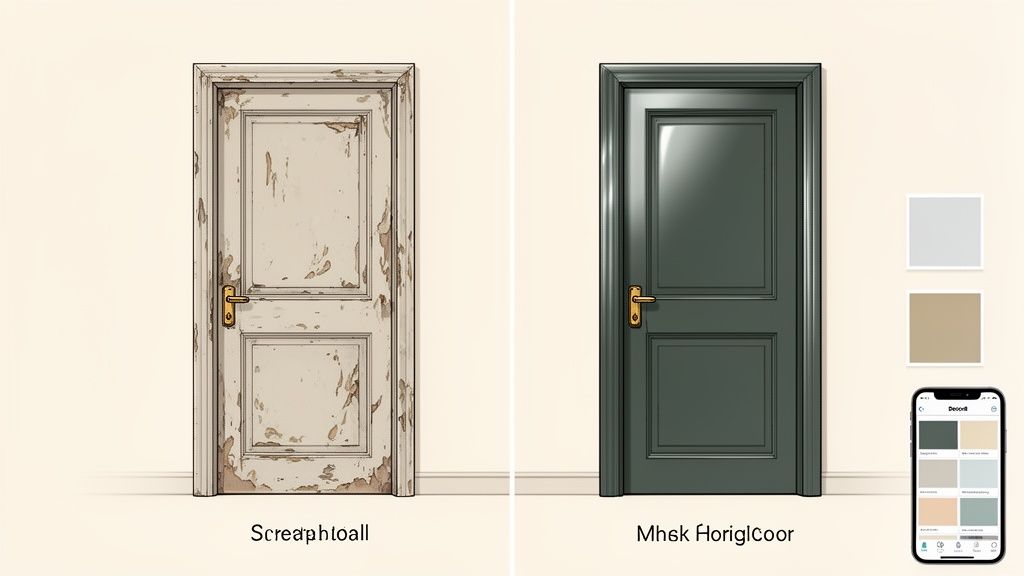
Previewing Your Perfect Door Color
Committing to a new door color can feel like a big deal, but you don't have to guess anymore. Instead of staring at tiny paint chips, you can use an AI visualizer like Decor8 to upload a photo of your actual door and see exactly how different colors will look.
This is a game-changer. It lets you test drive shades from brands like Sherwin-Williams or Benjamin Moore with confidence, ensuring the final color is the perfect fit for your home. After all, a bold front door is a huge part of creating an inviting foyer that sets the stage for your entire home.
Choosing Your Paint and Gathering the Right Tools
Any great paint job starts with having the right gear. Think of your tools and paint not just as costs, but as an investment in the final look and durability of your door. If you cut corners here, I can almost guarantee you’ll see it in the finished product.
Let's walk through building a toolkit that will get you that coveted, factory-smooth finish. This isn’t just a random list; each item plays a crucial role.
Building Your Professional Toolkit
The tools you use to apply the paint are where your money is best spent. A cheap brush that sheds bristles into your fresh paint is an absolute nightmare, and a low-quality roller will leave behind an orange-peel texture you definitely weren't going for.
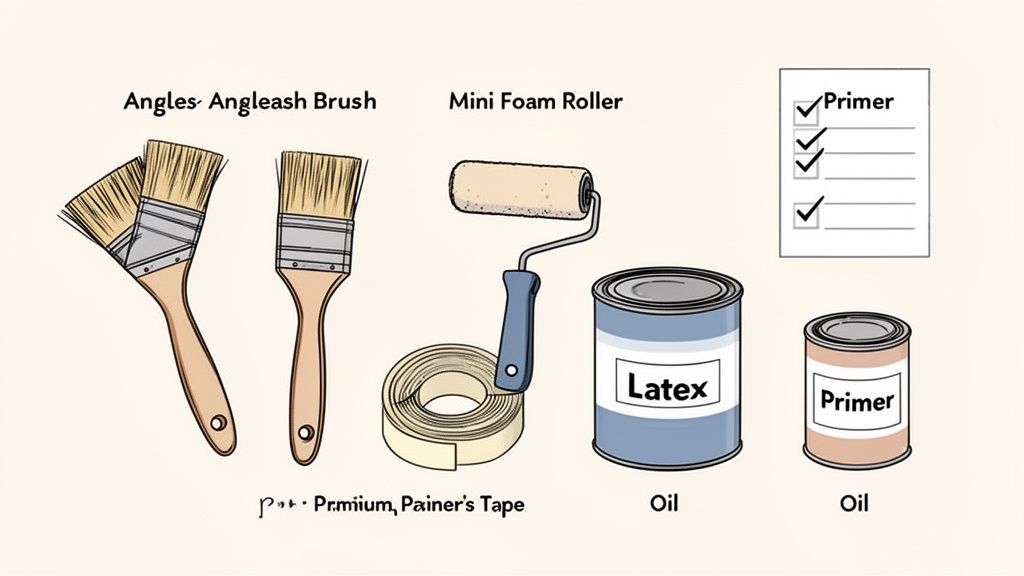
Here’s what I always have on hand:
2-Inch Angled Brush: This is your detail brush. An angled sash brush gives you incredible control when cutting in around panels, doorknobs, and the frame itself.
4 to 6-Inch Mini Foam Roller: For all the flat parts of the door, a high-density foam roller is your secret weapon. It lays down a super thin, even coat of paint that looks almost like it was sprayed on, erasing those pesky lap marks.
Quality Painter’s Tape: Please, don't grab the cheap stuff. A good quality tape like FrogTape or 3M Blue actually creates a chemical seal to stop paint from bleeding underneath. This is how you get those perfectly crisp lines.
Drop Cloths: I always recommend canvas drop cloths over plastic. They’re far less slippery and do a better job of absorbing any drips or splatters.
Sanding Sponges (Medium and Fine Grit): A medium-grit sponge (around 120-150) is what you'll use to rough up the old finish so the new paint can grab on. A fine-grit sponge (220) is perfect for a quick, light sanding between coats to knock down any dust nibs.
Pro Tip: Grab a small painter's pail that can hold both your mini roller and your brush. Many have a magnetic spot to hold the brush out of the paint, which saves you from fishing it out of the can. It’s a small thing that makes the whole process less messy.
Demystifying Primers and Paints
With your tools ready, it's time to talk about the coatings. Your choice here really boils down to the door's material, its current condition, and whether it’s facing the living room or the elements outside. Getting familiar with understanding the different door materials, such as fiberglass versus steel, can help you make the best choice for adhesion and a long-lasting finish.
When Do You Need a Primer?
Primer is the unsung hero of a paint job that lasts. It's the critical link between the door's surface and your beautiful topcoat. You absolutely must use a primer if:
The door is bare wood: Wood is thirsty. Primer seals it so it doesn't just drink up all your expensive paint.
You're making a dramatic color change: Going from dark to light (or vice versa)? A tinted primer will save you from applying three or four coats of paint.
The door has stains: Got a weird stain or a kid's marker art on there? A stain-blocking primer is the only way to ensure it doesn’t reappear through the new paint.
You’re painting over old oil-based paint with latex: This is non-negotiable. You need a special bonding primer to create a bridge between these two incompatible paint types, otherwise, your new latex paint will peel right off.
If your door is already primed or you're just refreshing the existing color with the same type of paint, you can often get away without this step.
The Great Debate: Latex vs. Oil-Based Paint
For decades, oil-based (alkyd) paint was the gold standard for doors because it dried incredibly hard. But modern water-based (latex) acrylic enamels have closed the gap and are now what I recommend for most DIY projects. They offer fantastic durability, have much lower odor, and clean up easily with just soap and water.
Look for high-quality trim paints like Benjamin Moore Advance or Sherwin-Williams Emerald Urethane Trim Enamel. These are formulated to "self-level," meaning they smooth out as they dry to hide brush strokes.
Before you commit, you can see how different colors from top brands will look on your actual door using an AI wall paint color visualizer. It’s a great way to avoid any color regrets!
The global doors market is valued at over USD 91 billion, and in that massive industry, efficiency is king. Pros often turn to paint sprayers, which can slash labor time by up to 70%. While you may not need a professional sprayer, it highlights just how much the right application technique matters for a flawless finish.
Paint Finish Comparison for Doors
Choosing the right paint sheen is just as important as the color. It impacts how the door looks, how durable it is, and how easy it is to clean. Here’s a quick breakdown of the most common finishes for doors.
Finish Type | Best For | Durability | Hides Imperfections | Cleaning |
|---|---|---|---|---|
Satin | Interior doors, main entry doors | Good | Fair | Good |
Semi-Gloss | All doors, especially high-traffic areas | Excellent | Poor | Excellent |
High-Gloss | Statement front doors, architectural details | Very High | Very Poor | Superior |
Eggshell | Low-traffic interior doors (e.g., closets) | Fair | Good | Fair |
For most interior and exterior doors, satin or semi-gloss offers the best balance of durability and appearance. High-gloss can be stunning but will show every single flaw, so your prep work needs to be perfect.
Getting the Prep Work Right: The Foundation of a Great Paint Job
Ask any painter with a few years under their belt, and they'll tell you the same thing. The secret to a durable, professional-looking paint job isn't the paint itself or even the final brushstroke. It’s all in the prep work.
Honestly, prep is about 80% of the job. Cutting corners here is the fastest way to get a finish that chips, bubbles, or just looks amateur. This is the groundwork that ensures your new paint has a clean, stable surface to stick to.
First Things First: A Serious Deep Clean
Doors are high-traffic surfaces that collect more grime than you’d think—fingerprints, oils, dust, and all sorts of buildup. Paint simply won't adhere to a dirty or greasy surface.
You’ll want to give the door a really good scrub. A simple bucket of warm water mixed with a degreasing cleaner works perfectly. You can use a TSP (Trisodium Phosphate) substitute or even a few squirts of strong dish soap. Grab a sponge and get to work on the entire surface, paying special attention to the area around the doorknob where oils from hands tend to collect.
Once you're done scrubbing, rinse it all off with a clean, damp cloth to get rid of any soap residue. Then, just let it air dry completely. Don't even think about touching it with sandpaper until it's bone dry.
The Hardware Dilemma: Remove It or Tape Around It?
When it comes to doorknobs, locks, and hinges, you have two options: carefully tape around them or take them off. While taping seems like the quicker route, I always recommend spending the extra 15 minutes to remove the hardware.
Trying to tape hardware perfectly is a fool's errand. There’s almost always a tiny gap where paint can bleed through, ruining your nice brass or chrome finish. Removing it is the only way to guarantee crisp, clean lines and allows you to properly seal the door by painting the surface underneath.
Here's a simple system I use to keep from losing any screws:
Grab a Ziploc bag. Label it with the door's location (e.g., "Hall Closet").
Unscrew everything—the knobs, faceplates, and even the hinges if you're taking the door down.
Put every last piece in the bag. This little step saves a massive headache when it's time to put everything back together.
Sanding: The Most Important Step You Shouldn't Skip
Sanding is absolutely non-negotiable. The goal isn't to strip off all the old paint down to the bare wood. It’s about scuffing up the old finish to create a microscopic texture—what painters call "tooth"—that the new primer and paint can physically grip onto.
For a door that's in pretty good condition, a light scuff-sanding is all it takes. A 120 to 150-grit sanding sponge or piece of sandpaper is perfect for this. You just want to knock down the gloss. You'll know you're done when the whole door has a dull, matte look.
If you're dealing with peeling paint or some deeper gouges, you'll need to be a bit more aggressive. Start with a coarser 80-grit paper to smooth out the problem spots, then go over it with the 120-grit to blend your repair into the rest of the surface.
After sanding, wipe the entire door down with a tack cloth or a damp microfiber rag to pick up every bit of dust. A clean surface is critical—if you've ever tried to paint a dusty wall, you know how frustrating those little bumps can be. Our guide on the Decor8 AI wall touch-up tool really drives home how much of a difference a perfectly prepped surface makes.
Taping Off for Razor-Sharp Lines
With the hardware gone and the door sanded and clean, the last prep step is masking. This is how you get those super satisfying, crisp paint lines that make the job look professional.
Grab a roll of high-quality painter's tape to protect anything you don't want to get paint on.
Glass Panes: If your door has windows, carefully apply tape along the edge of the glass. Use a putty knife or a credit card to press the edge down firmly. This creates a tight seal that stops paint from seeping underneath.
Walls and Trim: If you're painting the door while it's still hanging, run a line of tape along the wall where it meets the door frame.
It might feel tedious, but this attention to detail is what separates a decent DIY paint job from a fantastic one. Poor preparation is the number one reason paint fails early. Taking your time here can actually make your new paint job last up to 200% longer, turning a 3-5 year finish into one that looks great for a decade or more. The importance of durable, long-lasting finishes is a major focus in paint market trend reports. Think of this prep work as a direct investment in your home.
Time to Paint: Applying the Paint Like a Pro
You've done all the hard work of prepping, and now it's time for the payoff. This is where your patience and attention to detail really shine. Forget just slapping paint on—a methodical approach is what separates a decent DIY paint job from one that looks like it came straight from the factory. The secret to a flawless finish without drips or ugly lap marks is all in the technique.
Let's break down the exact methods the pros use for different types of doors.
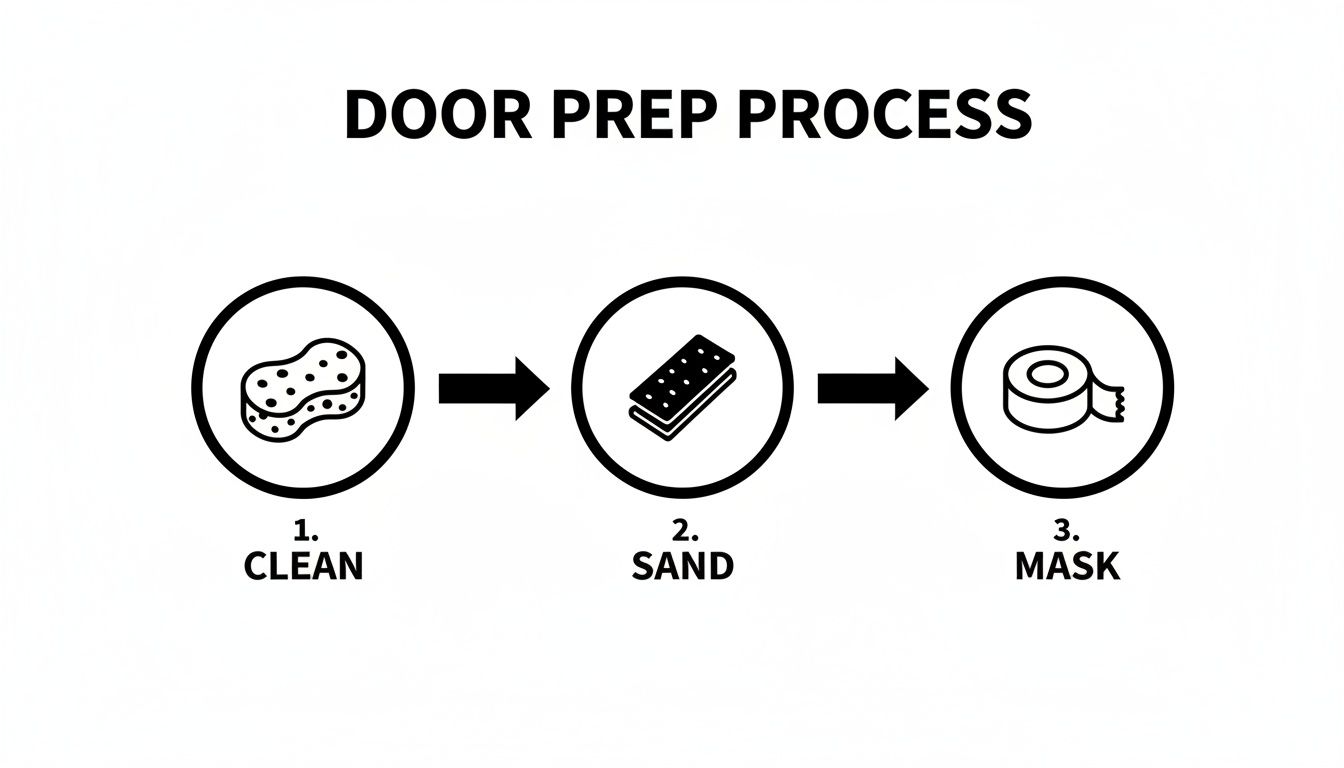
This image sums it up perfectly: a great paint job starts with a perfectly clean, sanded, and masked surface. Now, let's build on that foundation.
How to Paint a Classic Paneled Door
Paneled doors have a ton of character, but all those details can be tricky. If you just start painting the flat parts, you’re guaranteed to end up with drips and heavy brush marks in all the wrong places. The trick is to work from the inside out.
Here’s the sequence that guarantees a clean finish every time:
Tackle the Panels First: Grab your 2-inch angled brush and carefully paint the recessed molding around each panel. Right after that, switch to your mini foam roller to quickly fill in the flat center of the panel. This combo gives you crisp detail without a mess.
Move on to the Rails: Next up are the horizontal cross-pieces, which are called the rails. Paint the top one, then the middle, and finish with the bottom rail.
Finish with the Stiles: The last step is to paint the long vertical sections on the left and right sides of the door, known as stiles. Use long, smooth strokes from top to bottom to bring it all together.
Following this "inside-out" order helps you maintain a wet edge, which is absolutely critical for preventing those dreaded lap marks where fresh paint overlaps with paint that's already started to dry.
The Secret to a Perfect Flat Door
A modern, flat door might look easy, but getting that perfectly smooth, texture-free surface is an art form. The technique is called "tipping-off," and it combines the speed of a roller with the delicate touch of a brush.
Start by using your mini foam roller to apply a thin, even coat of paint. Don't try to paint the whole door at once; work in small, manageable sections, maybe about one square foot at a time.
As soon as you’ve rolled a section, immediately take a high-quality, dry paintbrush and gently glide just the tips of the bristles across the wet paint. Do this in one direction, from top to bottom. This light touch is just enough to knock down the tiny bumps left by the roller, leaving you with an incredibly smooth, almost spray-like finish.
Pro Tip: The goal of tipping-off isn't to spread more paint around. You should be using almost zero pressure. Just think of it as lightly grazing the surface with the very ends of the brush.
Don't Overload Your Brush or Roller
This is probably the single most common mistake I see. Loading up your brush or roller with too much paint is a one-way ticket to drips, runs, and a thick, uneven texture. Thin, consistent coats are the name of the game.
For your brush: Only dip the first one-third of the bristles into the paint. Instead of wiping the brush on the rim of the can (which just creates a gloppy mess), gently tap both sides against the inside of your paint pail to knock off the excess.
For your roller: Get some paint on the roller, but don't dunk it. Use the ribbed section of your paint tray to roll off the excess until you have a lightly saturated, uniform coat that isn’t dripping.
Remember, it’s always, always better to apply two thin coats than one thick, heavy one. A thick coat looks sloppy and takes forever to cure properly, making the door vulnerable to nicks and scuffs for weeks.
Drying Time and Your Second Coat
You have to be patient between coats. While latex paint might feel dry to the touch in just an hour or so, it hasn't fully cured. If you jump the gun and apply the second coat too early, you can actually re-wet the first layer, causing it to drag, clump up, or even peel right off.
Always check the paint can for the manufacturer's recommended recoat time. As a general rule of thumb, you should wait at least four to six hours before starting your second coat. For some of the newer, harder-curing enamel paints, you might even need to wait longer.
Before that second coat goes on, do one last quick prep step. Lightly scuff the entire door with a fine-grit (220) sanding sponge. This tiny step knocks down any dust nibs that may have settled while the first coat was drying and makes your final finish feel incredibly smooth. Wipe it all down with a tack cloth, and you're ready for the final coat.
For those wanting to take their finish to the next level with different equipment, there's a great guide to using a paint spray gun airless system. By following these steps, you're not just changing a door's color—you're creating a durable, professional finish that will make a huge difference in your space.
The Finishing Touches and How to Dodge Common Pitfalls
You’ve applied that final coat of paint, and the door is looking sharp. This is where patience really pays off. It’s these last few details that separate a decent DIY job from one that looks truly professional, making all that prep work worthwhile.
One of the best parts of any paint job is peeling off the painter's tape to see that perfectly clean line. But timing is critical. Pull it too soon, and you risk the paint bleeding. Wait too long, and you might tear off chunks of your beautiful new finish right along with the tape.
The trick is to remove the tape when the paint is dry to the touch but hasn’t fully cured. Gently pull it back on itself at a 45-degree angle, away from the fresh paint. This simple technique cleanly shears the paint film, leaving you with that crisp, satisfying edge.
Putting It All Back Together
After all that careful work, the last thing you want is a fresh fingerprint or a ding in your new paint. Even though the door might feel dry in a few hours, the paint hasn't fully cured yet. Curing is the chemical process where the paint transforms into a hard, durable finish, and it can take anywhere from a few days to a few weeks.
As a rule of thumb, give it at least 24 to 48 hours before you even think about putting the doorknobs, locks, and hinges back on. It’s so tempting to rush this part, but it’s a classic mistake that can easily ruin your work. That extra waiting time allows the paint to harden enough to handle the pressure from the hardware.
A freshly painted door needs to breathe. If you can, avoid closing it all the way for at least 72 hours, especially if it's humid. This keeps the paint from sticking to the door frame or weather stripping—a mishap that can peel the paint right off the first time you open it.
Troubleshooting Common Painting Problems
Even the most experienced painters run into issues now and then. Don’t worry if you see a flaw; most common mistakes are fixable without having to strip everything down and start over. Here’s how to handle the usual suspects.
Pesky Brush Marks or Roller Stipple
This usually happens one of two ways: you either put the paint on too thick, or you kept fussing with it as it started to dry. Modern self-leveling paints are amazing, but you have to trust them to do their thing and leave them alone once they’re on the door.
The Fix: Let the paint dry completely—give it a full 24 hours. Then, lightly sand the entire surface with a fine, 220-grit sanding sponge. You’re just trying to knock down the texture, not remove the paint. Wipe away every speck of dust with a tack cloth and then apply one last, very thin top coat.
Drips and Runs
Drips are just gravity at work, pulling excess paint down a vertical surface. They love to show up in the corners of panels or along the bottom edge of the door.
The Fix: If the paint is still wet, you can often just gently brush it out. If the drip has already dried hard, take a sharp utility knife and carefully slice off the raised bump. Then, sand the spot smooth, wipe it clean, and use a small artist's brush for a targeted touch-up. A great finish on doors and trim can elevate any room, much like how finding the right combination of brown walls and white trim can create a timeless home style.
Bubbles and Blisters
Seeing bubbles in your finish is almost always a sign of a contamination problem. It means moisture, oil, or dust was trapped underneath, and the new paint is pushing it out.
The Fix: This one requires you to fix the source of the problem. Scrape off the bubbly paint and sand the area until it's smooth. Clean the spot thoroughly with a degreaser to remove any residue. Before you repaint, apply a stain-blocking primer to that specific area to seal it off and prevent the bubble from coming back.
Common Questions We Get About Painting Doors
Even after laying out all the steps, there are always a few lingering questions that pop up right before the brush hits the door. Let's tackle some of the most common ones I hear, so you can move forward with confidence.
A big one is always, "Do I really have to take the door off the hinges?" Look, I get it. It seems like a lot of extra work. And while you can technically paint it while it's hanging, I almost never recommend it. Gravity becomes your worst enemy, leading to drips and runs. More importantly, you can't properly paint and seal the top and bottom edges, which is the key to preventing moisture from warping the door over time. For a finish that looks and feels professional, taking it down is the only way to go.
The Right Conditions and That All-Important Cure Time
People also wonder about the perfect painting environment. What's the ideal temperature? For most latex and oil-based paints, you're looking for a sweet spot between 50°F and 90°F (10°C to 32°C). Just as crucial is the humidity—try to keep it below 50%. High humidity is a project killer; it slows drying to a crawl and can leave your paint feeling tacky for days. Painting in extreme heat or cold is also a no-go, as it messes with how the paint cures, which can make it brittle and easy to chip later on. The paint can is your best friend here; always double-check the manufacturer's specific advice.
This brings us to the million-dollar question: How long until I can close my newly painted door? Patience is everything here. Closing it too soon is the single fastest way to ruin all your hard work. The paint might feel dry to the touch in just a few hours, but it's far from fully cured.
A good rule of thumb is to wait at least 24-48 hours before you even think about gently closing it. If you're in a humid area, I’d push that to 72 hours to be completely safe. Trust me, giving it that extra time is worth it for a perfect, durable finish.
Got more questions about your home projects? We've probably answered them. Take a look at our comprehensive list of FAQs for more expert tips and tricks.
Tired of taping paint swatches to your door? With Decor8 AI, you can upload a photo and see exactly how hundreds of colors from brands like Sherwin-Williams and Benjamin Moore will look. Stop guessing and start seeing. Try Decor8 AI for free today and find your perfect color in seconds.
Comments