A Guide to Beadboard Paneling Bathroom Transformations
- oliverjames0609
- 4 days ago
- 15 min read
Thinking about using beadboard paneling in a bathroom? It’s a fantastic way to bring in some classic architectural charm and a fresh, clean vibe. That signature look—those narrow vertical planks with the little grooved "beads" between them—instantly adds a layer of character that you just don't get from a plain painted wall.
Why Beadboard Paneling Is a Timeless Bathroom Choice
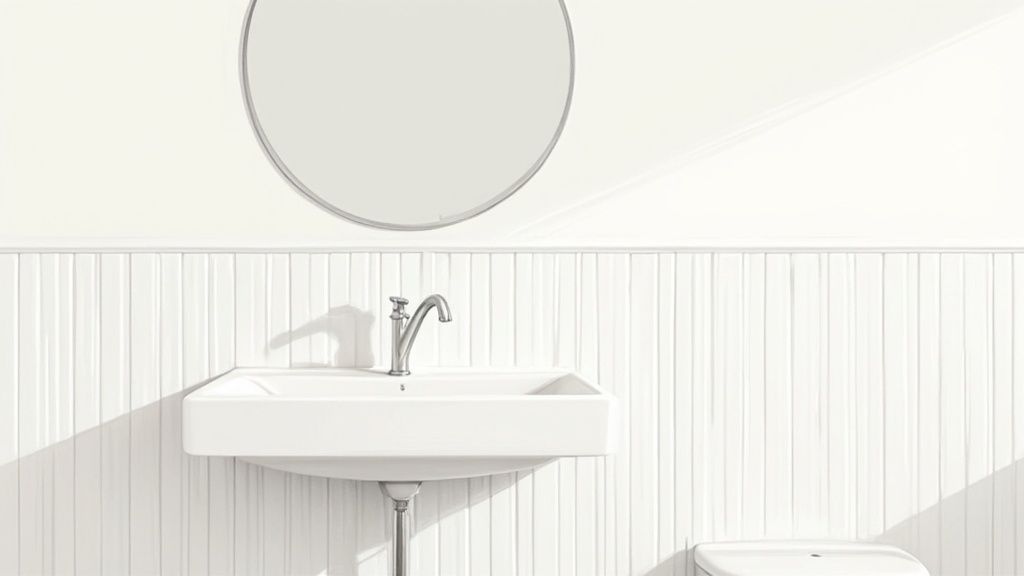
When you're planning a bathroom refresh, one of the first questions is always about durability. Can a classic material like beadboard really hold up in a steamy, humid space? The answer is a definite yes, as long as you pick the right material and finish it properly. This isn't just a wall covering; it's a design statement that gives your bathroom personality.
Beadboard really shines at bridging the gap between style and function. It adds texture and visual weight to the lower part of your walls, which helps break up flat, boring surfaces and makes the room feel more dynamic. It’s also incredibly versatile and fits right into a bunch of popular styles:
Coastal and Nautical: Nothing says "breezy seaside cottage" quite like crisp, white beadboard.
Modern Farmhouse: Pair it with a rustic vanity and some matte black fixtures, and you’ve got instant cozy charm.
Traditional and Classic: It offers a historically inspired backdrop that feels both elegant and grounded.
For a quick overview, here's what you need to know.
Beadboard in Bathrooms At a Glance
Attribute | Key Benefit or Consideration |
|---|---|
Aesthetic Appeal | Adds instant character, texture, and architectural detail. |
Versatility | Complements Coastal, Farmhouse, Traditional, and even modern styles. |
Durability | With the right material (like PVC) and finish, it stands up well to moisture. |
Installation | DIY-friendly, especially with modern panel formats. |
Imperfection Hiding | Excellent for covering up minor wall flaws like cracks or uneven drywall. |
Material Choice | Crucial for bathroom use; PVC or moisture-resistant MDF are best. |
Maintenance | Requires proper sealing and painting to prevent water damage and mildew. |
Ultimately, beadboard gives you a lot of bang for your buck in terms of visual impact.
From Victorian Workhorse to Modern Design Staple
Beadboard isn’t some fleeting trend; it has serious history. It first became popular back in the late 19th century as a tough, good-looking wall covering in Victorian homes. Its practical nature made it ideal for hardworking areas like kitchens, hallways, and, you guessed it, bathrooms.
Today, with the resurgence of vintage and classic design, beadboard is back in a big way. And this isn't just a feeling—the numbers back it up. By 1920, over 40% of middle-class American homes had beadboard somewhere. Fast forward to a 2023 survey, which found that 28% of bathroom remodels now include it. That’s a huge jump from just 19% a few years earlier, proving its timeless appeal.
The real magic of beadboard is its ability to make a room feel custom-built and thoughtfully designed. It’s an investment in character, not just a way to cover a wall.
Beyond its good looks, beadboard offers a ton of flexibility. You can install it as traditional wainscoting on the lower third of the wall or go for a more dramatic look with a full-wall installation. The height, color, and trim you choose can completely transform the space, which is why it’s a key part of many effective bathroom interior design strategies. This allows you to create a bathroom that feels beautiful and totally you.
Next up, we’ll dive into how to pick the best materials and install them correctly so your beadboard bathroom will look great for years to come.
Choosing the Right Beadboard Material for a Humid Space
Picking the right material for your beadboard paneling bathroom project is probably the most critical decision you'll face. Bathrooms are a constant battle against moisture, steam, and humidity swings. Your choice here will determine whether that charming new wainscoting lasts for years or turns into a warped, moldy headache.
Think of it this way: you wouldn't wear a cotton jacket in a downpour. The same logic applies here. Standard wood or basic MDF will act like a sponge, soaking up every bit of moisture from a steamy shower. Before you know it, you're dealing with swelling, warping, and rot. That’s why opting for a moisture-resistant material isn't just a suggestion—it's a must for a project that looks great and holds up.
Solid Wood: The Classic Choice (With a Big Catch)
Solid wood is the original, the classic. It brings an authentic charm and warmth that’s hard to beat, and you can stain or paint it to match just about any style. But—and it's a big but—solid wood is incredibly vulnerable in a high-moisture bathroom with a shower.
Even with the best paint job and a top-notch sealant, wood is a natural material that expands and contracts with humidity. This constant movement eventually causes the paint to crack at the seams, creating tiny openings for water to seep in. Once moisture gets behind that protective layer, you’re on a fast track to swelling, stains, and mold. It's a beautiful choice, but best saved for a powder room where its good looks won't be threatened by daily steam.
Moisture-Resistant MDF: The Smart, Engineered Solution
For a great middle-ground option, look no further than Moisture-Resistant MDF (or MR-MDF). This isn't your standard fiberboard. It’s an engineered product made by compressing wood fibers with special resins and wax, creating a dense, stable panel specifically designed to handle humidity much better than its regular counterpart.
A Designer's Go-To: MR-MDF gives you that clean, smooth look of wood and a perfect surface for paint, but it doesn't have the same tendency to warp. It's a budget-friendly way to get a high-end finish, which is why so many of us rely on it for bathroom projects.
Now, it’s not completely waterproof, but MR-MDF performs beautifully when you take the right steps. A good primer, a quality semi-gloss paint, and careful sealing along all the cut edges will make it a reliable workhorse for most bathroom applications. It strikes a fantastic balance between cost and durability.
PVC and Vinyl: The Waterproof Champions
When you absolutely cannot afford to worry about water damage, PVC or vinyl beadboard is the clear winner. This stuff is essentially a high-quality plastic, which means it’s 100% waterproof. It simply cannot rot, swell, warp, or grow mold, no matter how much splashing or steam you throw at it.
It’s like putting a protective shield on your walls. PVC is perfect for high-traffic family bathrooms, the area around a tub, or anywhere else that gets a lot of direct water exposure. Its popularity is booming for a reason. In fact, specialty wall panels like PVC beadboard now make up roughly 18% of the market, largely because they're so practical. Installation can be up to 40% faster than tiling, and the design can even help air circulate behind the panel, which further reduces moisture.
PVC is also incredibly lightweight and easy to work with. It usually comes pre-finished in a crisp white, but you can paint it to match your color scheme. For total peace of mind in a beadboard paneling bathroom, you really can’t make a smarter choice.
Comparing Beadboard Materials for Bathroom Use
To make the decision a bit easier, here’s a quick breakdown of how the most common beadboard materials stack up against each other in a bathroom setting.
Material | Moisture Resistance | Durability | Average Cost | Best For |
|---|---|---|---|---|
Solid Wood | Low | Moderate | $$$ | Powder rooms or very well-ventilated bathrooms; staining. |
MR-MDF | High | High | $$ | Most bathrooms (without direct water contact); painted finishes. |
PVC / Vinyl | Excellent (Waterproof) | Excellent | $$ | High-moisture areas, tub/shower surrounds, kids' bathrooms. |
Ultimately, PVC and MR-MDF are the top contenders for most bathroom projects, offering the best defense against moisture. While wood has its place, it's a riskier bet in a room that sees daily use. And if beadboard isn't quite right, remember there are other durable and stylish options out there—exploring different bathroom tile types to consider can open up a whole new world of design possibilities.
How to Install Bathroom Beadboard Step-by-Step
Putting up beadboard paneling is one of those DIY projects that looks impressive but is totally doable, even for a weekend warrior. With a little patience and the right approach, you can completely change the vibe of your bathroom. We’ll walk through the whole process, focusing on the little details that make for a durable, professional-looking finish that can stand up to moisture.
Think of it like building with Legos—every piece has to be measured and placed just right for the final result to be solid. Rushing the prep work is like trying to build on a wobbly table; you'll never get that clean, seamless look you're after.
This simple flowchart breaks down the material choice you'll face.
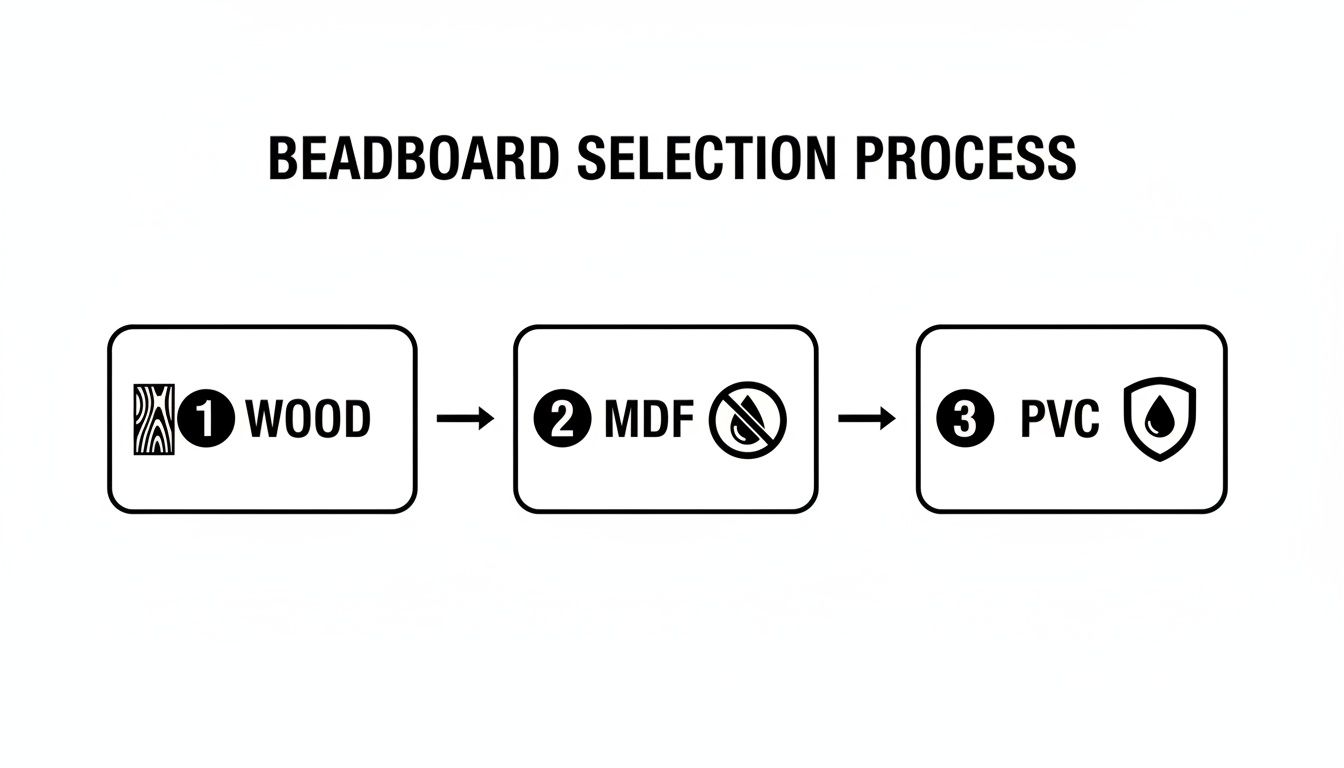
The takeaway here is pretty clear: for bathrooms, PVC is the undisputed champion. It's completely waterproof, which is something wood and even moisture-resistant MDF can't claim.
Step 1: Prep Your Walls and Gather Your Tools
Before you even think about putting up a panel, you need to get your walls ready. A clean, smooth surface is absolutely critical for a strong bond.
Start by prying off the old baseboards and removing any switch plates or outlet covers. Fill any noticeable holes or dings with spackle, let it dry, then give the whole area a light sanding to even things out. A quick wipe with a damp cloth gets rid of all the dust.
Not sure how your walls will look once prepped? You can use a free AI wall touch-up tool to get a sneak peek of a perfectly clean, primed surface before you begin.
Finally, get all your tools in one place. There’s nothing worse than having to stop mid-project to find something.
Your Essential Toolkit: * Tape Measure & Level * Pencil * Caulk Gun * Jigsaw or Circular Saw * Construction Adhesive * Brad Nailer (or a trusty hammer and finishing nails) * Waterproof Caulk & Wood Filler * Primer & Paint (if your panels aren't pre-finished)
Step 2: Measure and Mark Your Wainscoting Height
How high should your beadboard go? This is a big part of the design. A great rule of thumb is the "rule of thirds." For a standard 8-foot (96-inch) ceiling, that means your wainscoting would top out around 32 inches from the floor.
Of course, rules are made to be broken. Many people prefer a height of 36 to 42 inches, as it often lines up nicely with a windowsill or the top of a vanity.
Pro Tip: Don't just measure from the floor in a few spots. Use a level to draw a single, faint guideline all the way around the room. This guarantees your panels will be perfectly level, even if your floor has a slight slope.
Once you have your line, use a stud finder to locate and mark the wall studs. This is where you’ll nail the panels for a rock-solid installation.
Step 3: Cut Your Beadboard Panels to Size
Time to make some cuts. Measure from the floor up to the level line you drew, and transfer that measurement to your beadboard sheets. A circular saw with a fine-toothed blade will give you the cleanest, straightest cuts.
The trickiest parts will be cutting around outlets and pipes. Measure exactly where the obstacle needs to go on your panel and mark the cutout. A jigsaw is your best friend here—it lets you make those precise, custom cuts with ease.
Now for the most important step for any bathroom install: seal every single cut edge. Grab a good primer or a waterproofing sealant and coat any raw MDF or wood edges before they touch the wall. This simple action is your number one defense against moisture sneaking in and ruining your work.
Step 4: Secure the Panels to the Wall
With your panels all cut and sealed, you're ready to put them up. It's best to start in a corner and work your way out.
Apply the Adhesive: Run a generous S-shaped bead of construction adhesive on the back of the panel. Just keep it an inch or so from the edges to avoid messy squeeze-out.
Position the Panel: Press the panel firmly onto the wall, making sure the top edge lines up perfectly with your level guideline.
Nail It In: Use a brad nailer to drive finishing nails through the panel and into the studs you marked earlier. A few nails at the top and bottom are ideal, as they’ll be hidden by trim.
Lock and Repeat: For the next panel, apply your adhesive, then slide its groove over the tongue of the panel you just installed. This creates a tight, nearly invisible seam. Keep going until the room is done!
Step 5: Add the Trim and Finishing Touches
The trim is what really finishes the project, covering up all the seams and raw edges for that polished, professional look.
Start by installing the baseboard, then add the chair rail or cap molding along the top edge of the beadboard. Use a miter saw to get those perfect 45-degree angles for your corners.
Once the trim is nailed in place, go back and fill every nail hole with a dab of wood filler. Then, caulk all the seams—where the panels meet in the corners, where the trim meets the wall, and along the floor. Be sure to use a high-quality, paintable, waterproof caulk to create a seal that will lock out moisture for good.
Painting Beadboard for a Lasting Waterproof Finish
The final finish on your beadboard paneling bathroom is so much more than a color choice. It's the primary defense against the constant steam and moisture of a bathroom. Think of the paint job as a custom-fitted raincoat for your walls.
If you rush this step or use the wrong products, water will eventually find its way in. That leads to the peeling, bubbling, and mildew growth we all want to avoid, especially with materials like MDF or real wood.
A durable, waterproof seal actually begins long before you even pop open a can of paint. The secret is all in the prep work and choosing products specifically made for damp, humid spaces. This is the part of the job that makes sure your hard work looks great for years, not just months.
The Non-Negotiable Step: Priming Your Panels
Before a single drop of color hits the wall, you absolutely have to prime. Primer is like double-sided tape for paint; it gives the topcoat something to grip onto, creating a bond that’s tough as nails. In a bathroom, its job is even more important.
A high-quality, moisture-blocking primer creates a foundational seal that stops water from ever touching the core material of your beadboard. This is critical for moisture-resistant MDF and solid wood, which can still swell if water gets past the paint.
When you're at the store, look for primers specifically labeled for kitchens and baths. You'll also see terms like "stain-blocking" and "moisture-resistant"—those are the ones you want. They're built to fight humidity and prevent water spots from bleeding through your final color.
Priming isn't just about making the paint stick; it's about creating an impermeable shield. Skipping this step is like building a boat and forgetting to seal the hull—it might look fine at first, but it won't withstand the elements.
Beyond just paint, learning about different protective coatings can seriously boost your beadboard's longevity in a humid room. A little extra knowledge here can help you build an even tougher finish.
Choosing the Right Paint Finish for a Bathroom
Now for the topcoat. The sheen you choose makes a huge difference. While a flat or matte paint might look sophisticated in a living room, it's a terrible choice for a bathroom. Those finishes are porous, meaning they trap moisture and are a real pain to clean.
For a beadboard paneling bathroom, your best bets are satin or semi-gloss paints.
Here’s why they work so well:
Moisture Resistance: The way these paints are made creates a tighter, less porous surface that beads water right off.
Washability: Bathrooms get messy. The slight shine makes it easy to wipe away soap scum, toothpaste splatters, and fingerprints without scuffing the paint.
Durability: These finishes are simply tougher and designed to handle the regular scrubbing a bathroom requires.
Satin gives you a soft, subtle glow, while semi-gloss has a more noticeable shine that really makes the details and grooves of the beadboard pop. It mostly comes down to personal taste, but either one will give you the protection you need.
If you're stuck on what color to pick, try using an AI wall paint color visualizer to see how different shades and sheens will look in your own bathroom before you buy the paint.
Pro Tips for a Flawless Application
Getting that perfectly smooth, almost factory-like finish takes a bit of technique. Those little grooves in beadboard are famous for collecting too much paint, which causes drips and looks sloppy.
Here's the trick: paint the grooves first with a small, angled brush. Immediately after, go over the flat parts of the planks with a small foam roller. This two-step process gets you even coverage without overloading the channels with paint.
For bigger jobs, a paint sprayer is a fantastic tool. It can give you an incredibly smooth, professional-grade finish in a fraction of the time and ensures every nook and cranny gets a perfect, even coat.
Inspiring Beadboard Design and Styling Ideas

Okay, now that we’ve walked through the practical stuff, let’s get to the fun part: dreaming up how your beadboard paneling bathroom design will come to life. Beadboard is so much more than just a wall covering—it's a design workhorse that brings in texture, character, and a touch of architectural charm.
Think of it as the perfect backdrop for your vanity, mirrors, and light fixtures. Those crisp, vertical lines have a clever way of making a small bathroom feel taller and more spacious. It’s a classic foundation that works with just about any aesthetic you can imagine, whether you're going for a calm, spa-like retreat or a powder room with a serious wow factor.
Embrace Different Aesthetic Styles
One of the best things about beadboard is how incredibly versatile it is. It doesn't lock you into one specific look; instead, it adapts to your personal style, helping you create a bathroom that feels genuinely you.
Here are a few popular styles where beadboard really shines:
Classic Coastal Retreat: This is beadboard’s natural habitat. Picture crisp white paneling paired with soft blues, sandy tones, and natural textures like wicker or jute. It’s an instant recipe for a breezy, serene vibe. For some fantastic real-world examples, check out these Coastal Hamptons style bathroom transformations, where beadboard is often the star of the show.
Modern Farmhouse Charm: If you're aiming for cozy yet sophisticated, this is the way to go. Combine beadboard with a rustic wood vanity, matte black hardware, and simple, elegant lighting. Painting the beadboard a warm greige or a muted sage green gives this timeless style a fresh, modern update.
Moody and Sophisticated: Don’t be afraid to embrace the dark side! In a powder room or a bathroom with plenty of light, painting beadboard a deep navy, charcoal gray, or even a rich forest green can be absolutely stunning. Add some brass or gold fixtures, and the look becomes instantly luxurious and inviting. Dive deeper into creating this kind of atmosphere with our guide to the coastal interior design style.
Play with Height and Proportion
Where you stop your beadboard wainscoting has a huge impact on the room's overall feel. It’s a critical decision that can completely change the visual dynamic of the space, so it’s worth thinking about.
The traditional approach is to follow the "rule of thirds," meaning the top cap sits about one-third of the way up the wall. For a standard eight-foot ceiling, this is typically between 32 and 38 inches. This creates a classic, balanced look that grounds the room nicely.
But you can absolutely break the rules. Taking the beadboard higher—up to a half-wall or two-thirds application at 48 or 60 inches—draws the eye upward and adds a sense of grandeur. It’s a great trick for making a room feel taller. In a tiny powder room, you might even consider running the beadboard all the way up the wall for a cohesive, textured look that feels intentional and cozy.
Final Touches Make the Difference
The little details are what take a beadboard installation from good to great. Your choice of molding for the top cap and the baseboard is what really frames the paneling and solidifies its style.
A simple, clean-lined cap molding works perfectly for a modern or minimalist look, while a more decorative chair rail adds a touch of traditional elegance. Your baseboard should feel substantial enough to anchor the wainscoting, creating a solid foundation for the whole design.
This extra attention to detail really pays off. A 2024 trends report noted that 37% of bathroom photoshoots featured beadboard wainscoting, and in some markets, it can even boost property values by 8-12%. It’s also gaining ground in sustainable renovations, with certain types accounting for 31% of wood-based installations in the U.S. You can learn more about these market trends in wall panels.
Answering Your Top Beadboard Bathroom Questions
Even after you've got the basics down, a few questions always pop up when you're thinking about putting beadboard paneling in a bathroom. Let's tackle those nagging little worries head-on so you can move forward with your project feeling totally sure of your choices.
First up, the big one: cleaning. Are those little grooves going to be a nightmare to keep clean? Not at all, as long as you use the right paint. A good semi-gloss or even a satin finish creates a smooth, durable surface that you can easily wipe down. Dust and splashes won't really stick, so a quick pass with a damp cloth is usually all it takes.
What About Dings, Dents, and Repairs?
Life happens, especially in a busy bathroom. So, what do you do if a panel gets damaged? This is actually one of the best things about beadboard—it's much simpler to fix than something like tile. For small scuffs and scratches, a dab of wood filler, a light sanding, and a little paint will make it disappear.
And if you get some serious damage? You don't have to tear out the whole wall. You can just carefully cut out the single damaged panel and slot a new one in its place. It’s a much more forgiving and less expensive fix than having to re-tile a whole section.
The Secret to Durability: Your best defense is a good offense. If you start with a waterproof material like PVC and meticulously seal every single seam with a top-notch, mold-resistant caulk, you’ll prevent most moisture problems from ever getting a foothold.
Tricky Installation Scenarios
People often ask if they can install beadboard over tricky surfaces. What about putting it on top of old tile or those bumpy, textured walls?
Installing Over Old Tile: Absolutely. The trick is to fill in the grout lines first to get a smooth, flat surface. Then, just use a powerful construction adhesive made for sticking to slick surfaces like tile.
Installing Over Textured Walls: For walls with a light texture, just sand down the highest bumps to help the panels sit flat. If the texture is really aggressive, it's often better to nail up some thin furring strips first to create a perfectly even foundation.
Then there's the question of how high to go. While the classic "rule of thirds" (around 32-38 inches on a standard 8-foot wall) is a safe bet, it's not your only option. Taller beadboard can lend a very grand, formal feel to a space, while the standard height is just timeless. The best advice is to look at your own bathroom—consider the height of your vanity, toilet, and windows, and see what feels balanced.
Tired of just imagining it? With a tool like Decor8 AI, you can stop guessing. Just upload a photo of your bathroom and see exactly how different beadboard styles, heights, and colors will look. It's the perfect way to turn your ideas into a concrete plan.
Comments